Lawn Care
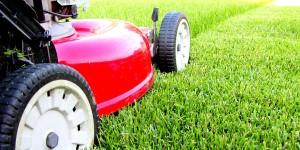 Lawn care is a big thing in the United States!
On the average Saturday morning, the sound of lawnmowers starting up can be heard throughout suburban communities.
By the afternoon, curbsides are lined with bags of lawn clippings.
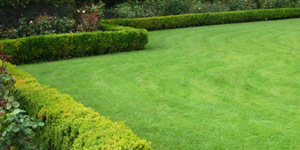
The well-manicured lawn is one of the most prevalent parts of the American landscape.
It ties the entire landscape together by joining the grounds with the surrounding sidewalks, streets, or neighboring properties.
The lawn improves the appeal of the whole property, making it friendly and inviting.
Lawns were initially conceived by Agricultural landowners in the 17th century, as a means of demonstrating their wealth, the modern lawn has evolved since its inception.
The modern lawn has several uses, not only as a facet of the landscape, but also as an area to picnic or enjoy outdoor recreational activities. A number of games, such as bocce or croquet, are specifically designed to be played on a precisely manicured lawn.
On a more practical level, lawns minimize the dust and dirt that get into the home or office. They absorb noise, reduce erosion and runoff from rain storms, reduce glare from the summer sun, and absorb the sun’s heat. The temperature difference between blacktop or concrete lots and a well-kept lawn is palpable. Expanses of green space in urban and suburban environments are important for the ecological health of the community as well as its aesthetic appeal.
Well-kept lawns are certainly assets to the community. Conversely, a poorly maintained lawn, with yellow patches and weeds can be an eyesore and prove detrimental to a neighborhood. Keeping a nice lawn takes work as well as skill. It is not simply a matter of cutting the grass regularly to keep it from getting too tall. The modern lawn requires a healthy amount of watering and occasional fertilizing as well.
Healthy soil is the foundation for a beautiful, healthy lawn. Many gardeners are fortunate enough to begin with well drained soils made of a good loam – a mix of organic matter, clay, sand, and silt. Some of us are stuck with poorly drained soils with too much clay content or sandy soils that do not retain water and dry out too quickly. The best way to identify your soil type and create a management plant is with a soil test. I will cover this in the section titled “Planning and Beginning a New Lawn“.
USDA hardiness zones identify the average minimum winter temperature and typical frost dates for an area. A plant’s hardiness level is the coldest area in which it can survive the winter. Fortunately, there are a variety of warm and cool season grasses that are adapted to survive various climates. Cool season grasses with go dormant and may turn brown during winter weather but recover as warm temperatures return.
Regular watering is one of the most important factors in growing a healthy, good-looking lawn. In most areas, Mother Nature will provide most of the water your lawn needs. However, in all areas you will have to supplement natural precipitation to varying degrees. Drought will cause grass to go dormant, and it will often turn yellow or brown when it does. But a properly maintained lawn can survive any drought. The section titled “Watering” will have more information about watering your lawn.
It is important to keep your grass healthy with proper fertilization and mowing as well. In in the section titled “Fertilizing” I will discuss various aspects of fertilization. In the section titled “Mowing” will cover the basics of properly mowing your lawn to encourage healthy growth.
Well-directed efforts will yield the results you want. A beautiful lawn is not very difficult to have and maintain. This guide is designed for anyone, from the novice gardener to the experienced horticulturalist, to have success with lawn care.
1. Planning and Beginning a New Lawn
 Your lawn can be the canvas on which you will create a colorful landscape of trees, shrubs, and flowers. The expanses of green grass can supply cohesion to the landscape. Or you might view your lawn more as a functional aspect of the landscape. Grass provides a good area for playing any number of games, and keeps feet from getting muddy when it rains. Regardless of your intent, a healthy lawn will be the best way to achieve your goal.
1a. Lawn Care 101: Preparing the site
Healthy soil is the foundation of any garden, and the lawn is no exception. Nutrient-poor soil results in non-productive plants. The lawn should be started by improving the soil’s fertility and drainage. Turf grass receives its nutrition mainly from the soil. Because of this, having the soil tested is an imperative. Soil tests measure the nutrient content and pH of the soil and tell you what needs to be adjusted.
For best results, collect a few separate samples from the front and back yards. For each area to be tested, collect four or five trowels of soil to a depth of 4 to 6 inches (10 – 15 cm). Mix the trowels from one area together. Labs that conduct soil testing can be located online, and charge a nominal fee for this service. Soil test results will reveal the nutrient levels, organic matter content, and pH of you soil, and will usually have recommendations for what to add to encourage healthy growth.
Because turf grass does not have particularly deep roots, the lime, phosphorus, potassium, or other recommended additives do not have to be tilled into the soil very deeply. Spread the additives over the soil surface and till it into the soil to a depth of 6 to 8 inches (15 – 20 cm). You can use a garden fork to till the soil, although depending on the size of the lawn, this may prove to be a great deal of work. Mechanical tillers are usually available to rent at garden centers or hardware stores. For this kind of project, I recommend using a mechanical tiller.
I also recommend tilling organic matter such as compost or manure into the site. If you do not already have a compost bin, I strongly recommend you begin one. Compost is nutrient-rich organic matter made up of kitchen scraps, such as eggshells and coffee grounds, and green or brown plant matter, called detritus. Composting is a way to turn your waste into free garden supplements. Alternately, you can till a layer of manure into the soil. Again, I recommend using a mechanical tiller to do this if you are working with a larger area.
It is better to work the soil when it is slightly moist, but not wet. Tilling wet soil will ruin its structure and drainage. Take a handful of soil and gently squeeze it into a ball. Then tamp it with your finger; if it stays in a ball, it is too wet. If the soil is too dry – almost like dust – then tilling will pulverize it. If the soil is like dust, either water the soil, or wait for a rainstorm to repeat the test.
Using either synthetic weed killers or mechanical means, remove all weeds and grasses from the site. Each method has its advantages and drawbacks. You should select the one that best fits your gardening philosophy, timeframe, and ability.
If you have the time, I recommend that you do not use chemicals to remove weeds from the site. Weeds can be mechanically removed by digging, hoeing, or smothering them. A very simple, organic method for smothering weeds is by covering them with sheets of black plastic. After you have added organic matter and roughly graded the site, cover the area with black plastic. Leave it covered for a minimum of three months before planting. The plastic will block out sunlight from reaching established grass and weeds, so that they eventually die.
Tilling, either mechanically or by hand, will have limited success if there are any plants in the soil that spreads via rhizomes, or underground stems. Tilling will only cut up and scatter the rhizomes throughout the area. Later they will root and grow.
Chemical methods using very specific herbicides are generally the most complete eradication approaches. A nonselective herbicide like glyphosate will kill anything green it touches. Discuss various chemical herbicides with knowledgeable staff at your local garden center to determine which kind is best for your lawn.
1b. Seed vs. Sod
You can start your new lawn from seed or sod. Seed mixes will give you a broader variety of grasses to choose from. Seeding is less expensive than laying sod but will require more time to establish the lawn. Seeded lawns often have fewer pest problems because the wide variety of seed mixes allows the gardener to better match the grass to growing conditions. Also the stem and root of the plant will develop together, resulting in more balanced growth.
Sod provides you with an instant lawn. Growers usually will select the best varieties for their area. This method is more expensive but takes less time to result in an established lawn. Gardeners who can afford to will sometimes sod the front yard and seed the back. This saves money while producing immediate curb appeal. Regardless of which method you choose, proper soil preparation and post-planting care are essential to success.
If seeding, carefully read the label when selecting the grass seed. Again, discussing seed mixes with knowledgeable staff at a garden center can help determine which kind is best for you. Often, spending a bit few extra dollars on a slightly more expensive mix now will save lots of headaches and time spent repairing bare spots, treating diseases, and mitigating other problems that could have been avoided.
Choose a mix with several quality cultivars of different types of grass seed. Varieties include Kentucky Bluegrass, Fine Fescue, Perennial Ryegrass, and Tall Fescue. This will increase disease resistance and reduce the risk of losing the entire lawn in the event of pest infestation. For new lawns with no trees or shade-producing structures, use a straight bluegrass mix. For lawns with more shade, use a mix with a larger percentage of fine fescue and less of the sun-loving bluegrass.
Spread the seed with the same kind of rotary spreader used for fertilizing the lawn. You can broadcast seeds by hand as well, but this can result in an uneven or patchy lawn if it isn’t done precisely. You will want to seed the lawn at a rate of 4 pounds per thousand square feet (2 kg per 300 m2). Sow half the seed in one direction and the other half at right angles to the first, in a grid pattern. This method provides uniform coverage and avoids any bare spots. Rake the soil lightly so the seed is just barely covered.
Mulch the newly seeded lawn with dried straw or a cellulose-based synthetic mulch. This will help conserve moisture and minimize erosion. Spread the mulch in a rather thin layer so as not to block sunlight from reaching the newly planted seed.
Water newly seeded lawns with moderate frequency. The soil should be kept moist but not soggy.
Sod is rolled up sheets of established grass plants. The turf is harvested, roots and all, and delivered on pallets to the garden center. So is more expensive, but is more effective than a seeded lawn at preventing runoff, and provides results instantly. For best results, install the sod as soon as possible on properly prepared soil.
Begin by laying sod parallel to the driveway or walkway. Lay the first row of sod against the longest side of these straight edges. Avoid pulling or stretching the sod, as it will shrink as it dries. Stagger the seams from one row to the next as if you were laying bricks. On hills with steep grades, lay sod perpendicular to the slope, and use short stakes to hold the sod in place.
Run an empty lawn roller over the sod to remove any air pockets and to ensure good contact between roots and soil. Push or pull the roller perpendicular to the direction the sod was laid. Water the sod immediately and thoroughly, and continue to water with moderate frequency for a few weeks after it is laid. Reduce watering frequency once the sod starts to root into the soil below. See the section titled “Watering” for a more complete discussion of lawn watering.
Begin cutting the grass when it is about a third taller than the height at which you intend to maintain it. This means that if you keep the grass 3 inches (7.5 cm) tall, cut it for the first time when it is 4 inches (10 cm) tall. See the section titled “Mowing” for more information on mowing the lawn.
1c. When to Plant
Generally speaking, late summer through early fall is the best time to seed lawns, although this will vary somewhat from one region to the next. Cooler temperatures will allow the soil to remain moist longer, which will require less frequent watering. Mid- to late spring, after the last frost, is the next best time to seed. Variable spring temperatures and heavy rainfall can make spring more challenging to establish a seeded lawn.
Do not seed lawns during the heat of summer. This will waste a lot of time and energy trying to establish cool-season grasses during heat waves and potential drought conditions.
You can lay sod anytime the ground is not frozen and sod is available for purchase. For best results, you should lay sod in spring or fall. As with seed, the cool weather and warm soils will result in fast rooting and require less watering.
1d. Renovating a Lawn
Renovating a poorly performing lawn means getting it reestablished and back into its best shape. Renovation may be partial, as in simply seeding over thinning patches. Or it may be complete, basically starting over from scratch. Some renovation is necessary when a lawn becomes thin and patchy or overgrown with undesirable weeds.
To begin, find the source of your lawn’s problem. If the issue is insect infestation, then have them properly identified and treat accordingly. Certain pests, such as aphids, can be eradicated with predatory insects like ladybugs or praying mantises. Others may be best treated with chemical insecticides. Often, thinning or weedy lawns are the result of improper management or soil conditions. Have the soil tested to determine if the problem is improper nutrient or pH levels. If the soil is compacted from heavy foot traffic or overly repetitive mowing patterns, you may have to aerate or amend the soil. This is covered in the section titled “Mowing“.
If none of these methods corrects your problem, it may be necessary to reseed or replant your lawn. Reseed thinning lawns to fill in bare spots, increase grass density, and overwhelm weeds. Before reseeding, cut the grass as short as possible and leave the clippings on the lawn to act as mulch for the new seed. Spread the seed as described above, with half the amount in one direction and the other half at right angles to the first.
Completely replacing the grass in small areas or across the entire lawn can also be done. In either case, replant the lawn as if you were beginning from scratch, and follow the steps outlined above.
2. Watering
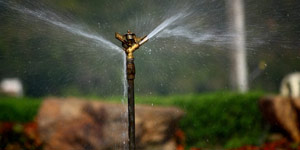 Weather, soil conditions, and the kind of grass you decide to grow will all influence the amount and frequency of watering your lawn requires. Of course, the hotter the weather, the more often you should water. Heavier soils that contain more organic matter require less frequent watering. Understanding the soil content and capacity will help you more efficiently water your lawn.
2a. Soil Capacity & Soil Makeup
Soil is made up of mineral particles of varying sizes and shapes, with water and air in spaces between them. The largest and heaviest particles are sane, which doesn’t hold nutrients or water. Silt are smaller, more angular particles, and clay particles are mostly flat and densely packed, allowing them to hold onto nutrient but preventing them from draining well.
The soil’s texture – the relative amounts of sand, silt, and clay – and its proportion of organic matter affect its ability to hold water. Sandier soil drains quickly, whereas clay-rich soil drains much more slowly.
A soil test will determine the texture of the soil. You can also tell the soil’s texture by touch. Squeeze a handful of moist soil through your index finger and thumb. Sandy soils will feel rough and gritty and just barely stay together. Heavy soils, with a high amount of clay, will be smooth and shiny, and difficult to break up.
If the soil holds its shape, and crumbles when given a slight poke, it’s loam, which is an ideal mix of about twenty percent clay, forty to fifty percent silt, and thirty percent sand, with a fair amount of humus, or decomposed organic matter, as well. Loam retains enough moisture to promote a healthy lawn, but it also has good drainage and enough space for air to circulate and roots to grow.
You can test the makeup of your soil using a simple water suspension. In this test, the particles of each component settle out of a water suspension at different levels and times because of their different weights.
Collect several trowels of soil from around the yard. Remove any rocks or other large detritus. Break up any clods of soil to speed the process up. Fill a clear quart or liter jar two-thirds full of water and one-third with soil.
Cover the jar and shake it vigorously until the soil particles are completely mixed with the water. Set the jar on a level surface. The biggest, heaviest sand particles will settle out of suspension in about a minute. Mark this level on the jar, and leave it undisturbed for a few hours. By then the lighter silt particles will have settled. Mark this layer. After 24 hours, the water should be clear, and the smallest, lightest clay particles will have settled. Mark this level.
If the thicknesses of each layer are about equal, you have a nicely proportioned, loamy soil. If they differ, estimate the relative volume of each to see if your soil is sandier, siltier, or more clay-rich.
Once you have a better idea of the soil makeup, you will have a clearer picture of how often you need to water it. Soils with a high percentage of sand will dry out quickly, while those with more clay will drain poorly and remain wet longer. Tilling organic matter such as compost into soils that have too much clay or sand will improve the drainage and water retention of both.
2b. When and How Much to Water
Water your lawn thoroughly but infrequently to grow healthy grass with deep roots. Light, frequent watering will produce shallow, weak root systems that are susceptible to drought. Apply enough water to moisten the top six inches (9 cm) of soil. Lawns grown in clay soils typically need a thorough watering about once every week to ten days, while those in sandy soils will need to be watered half as much, twice as frequently.
Over-watering can be just as harmful as under-watering. Too much water will fill up air pockets in soil, preventing roots from accessing nutrients and carbon dioxide, literally drowning the plants. Waterlogged soils will limit root growth and can increase the risk of disease.
Watering is best in the early morning, after the dew forms but before the sun is high in the sky. Early morning watering minimizes water loss and minimizes the spread of disease. Watering in the evening leaves the lawn wet for a longer period of time, increasing the risk of disease. Watering during the day increases water loss due to evaporation.
2c. Irrigation Systems
A water-saving, automated irrigation system can save you time and money. They can be installed by professionals or yourself if you are a do-it-yourself type. It is best to install systems that spray larger droplets close to the ground. This type of system requires more sprinkler heads per site, but the cost of this will be offset in a few years due to the amount of water you save.
You can mitigate the cost of an irrigation system by spreading it over a few years. Install irrigation heads in a few zones at a time, leaving connections available for future expansion. Avoid designs that waste water on sidewalks or driveways, and be careful not to over-water trees and shrubs. Invest in a rain sensor to avoid watering your lawn in the rain.
If you do not have a particularly large lawn, you can of course use a manually controlled sprinkler to water your lawn. Just be sure not to forget when you’ve turned left it on! I often see forgetful gardeners’ sprinklers going late at night, with water pooling on the lawn. This is wasteful and also bad for the health of the lawn.
There are several simple techniques for saving water that should be utilized. Plant drought-tolerant cultivars. Add organic matter to the soil whenever possible. Mow high and leave grass clippings on the lawn. Water early in the morning and avoid runoff. Aerate compacted soils, and apply fertilizer mostly in the fall. Set timers to remind you when to turn off manually operated sprinklers, or invest in an automated irrigation system.
3. Fertilizing
 To ensure a healthy lawn, there are a number of principles that should be followed when fertilizing. First, apply only what is needed. Fertilizing more than necessary can disrupt the pH of the soil. Don’t apply fertilizer when the lawn is wet or stressed by drought. As with seeding, apply fertilizer along a grid of right angles to ensure total coverage. Water the lawn thoroughly when applying in the summer. Avoid weed-and-feed combinations, and consider organic and slow release alternatives.
3a. Essential Nutrients
Sixteen nutrients are essential for healthy plant growth. In lawn care, we focus on the major three: nitrogen, phosphorus and potassium, although the secondary nutrients, including calcium, magnesium sulfur, and iron are also important.
Nitrogen provides healthy leaf and root growth, aids resilience to stress, and improves leaf color and density. Excessive nitrogen will encourage rapid leaf growth at the expense of the roots. It can also add to disease and insect infestation and reduce tolerance to temperature variation. Excessive nitrogen use can burn the lawn and result in runoff into local waterways.
Phosphorus is critical to the establishment of health root systems of lawn grass. It also assists in energy transfer inside the plant. Excessive phosphorus can also lead to problems. Potassium is associated with the health of the root system and is also believed to play a role in the plant’s ability to withstand environmental stresses, such as cold temperatures.
3b. What and When to Feed
A soil test will tell you what nutrients are lacking and will often recommend a specific prescription to best replace them. Select a fertilizer mix that best matches test recommendations. Additional nitrogen will be required each year to replace what has been used by the grass. Clippings left on the lawn, top composting, and adding synthetic fertilizers will keep the lawn healthy and attractive. Use the test recommendations as a starting point, and consider the lawn’s growth rate and appearance when deciding how much nitrogen to add.
Test results will also indicate how much phosphorus and potassium – if any – is required. They generally are slow to break down, and should be incorporated into the soil before planting. Additional applications will not be necessary, unless specifically recommended by the soil test.
The lawn will tell you when it needs fertilizer, just as it will indicate when it needs watering. Rainfall and temperature also dictate when you should apply fertilizer. Drought-stressed lawns that are fertilized in the heat of summer risk being burned without regular irrigation. Always water the lawn after, not before, feeding it. Fertilizer tends to stick to wet leaves, and that will risk burning the foliage.
It’s best to fertilize the lawn in late summer or early fall. Apply the majority of the recommended nitrogen in the fall. This will encourage denser, instead of simply taller, growth. Fertilizing during the summer can risk encouraging weed growth instead of a healthy lawn.
3c. Organic vs. synthetic
Although the grass will not differentiate between organic and synthetic fertilizers, I prefer organic products because they tend to be released more slowly and provide more benefits to the soil. Organic fertilizer must be broken down by microbes, moisture, and temperature, and integrate into the soil at a rate that allows the plant to use it over a longer period of time. This results in better overall growth of the plant, instead of a sudden inefficient growth spurt.
Organic fertilizers include compost and manure. The breakdown of compost and manure depends largely on the microbes available in the soil or compost bin. Organic fertilizers produce less foliage burn and typically do not leach into the soil. Disadvantages include lower nutrient concentrations and needing larger amounts to meet the lawn’s needs. They are slower to improve nutrient deficiencies, and often do not break down well in cooler climates.
If you are particularly interested in Organic Gardening, I invite you to check my extensive guide on this subject. Contrary to popular beliefs, organic gardening is not only about vegetable gardens. This other guide will allow you to apply organic gardening principles to your lawn care efforts.
Quick-release fertilizers dissolve quickly in water and become immediately available to the plant. The unabsorbed portion will be washed away through the soil and past the roots by excess water. Advantages of these fertilizers include quick availability to the plant and a correspondingly quick response in growth and greening. Disadvantages include inefficiency due to leaching from irrigation, lowering soil pH if the fertilizer contains ammonia, increase in pH if it contains lime, and a rapid spurt in plant growth, requiring more mowing. These products are best used by applying small amounts more frequently.
3d. How Much to Apply
Application rates correspond to 1 pound of actual nitrogen per 1,000 square feet of lawn (450 g to 90 m2). Therefore if you are using a fertilizer that has a manufacturer analysis of 17:17:17, the application rate would be 5.8 pounds per 1,000 square feet (2.6 kg to 90 m2), because it contains only 17 percent actual nitrogen. This was derived by dividing 100 by 17. The formula is applicable regardless of the nitrogen, phosphorus, or potassium amount.
Most fertilizer bags will indicate how much to apply, but you should determine how much your lawn needs, as they may be higher than you require. Using soil test results and the above formula, you should be able to determine the correct amount required for your lawn.
4. Mowing
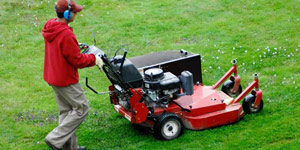 Mowing properly is important to maintain the health and beauty of the lawn, and doing so will reduce the stress on the lawn. By following the proper techniques, you can ensure your lawn is maintained with minimal extra maintenance for many years.
4a. How Often to Mow & How High to Mow
Although most homeowners tend to mow every seven to ten days, most lawns in fact require mowing more frequently – every four to five days. It is best for the health and beauty of the lawn to mow it whenever it has grown a third taller that the recommended growing height. This means that if you keep the grass 3 inches (7.5 cm) tall, you should cut it whenever it is 4 inches (10 cm) tall, so that you remove only one-third of the blade when mowing. Of course, your schedule may not permit you to mow this frequently, so you may have to improvise.
Frequent mowing is best for keeping the lawn healthy. Smaller clippings will fall easier between grass blades, breaking down quickly with sunlight and moisture. Because the grass has evolved in tandem with grazing herbivores, it will respond positively to frequent mowing. Quickly removing too much of the blade at one time can shock the root system, weakening the overall health of the plant.
Continue to mow as long as the grass is growing, which generally means well into the fall. Do not mow when the grass is wet, as clippings will clump. Hotter, drier weather will reduce the frequency required to keep to mowing one-third at a time. Dormant lawns do not require mowing, but should be monitored for weed invasion.
I recommend measuring the actual length of the leaf blades to see precisely how the height compares to the mower setting you are using. Most mowers have adjustable heights. The ground level may be variable across your lawn, so taking an average of several measurements will give you a better idea of the best setting for your mower.
Mow high. Cutting the grass too short will result in “scalping” it – it will not have enough leaf left for photosynthesis to occur, and this will kill it. Short grass is less tolerant of heat and drought and cannot develop healthy root systems. Generally speaking, the taller the grass, the deeper the roots. Keep your lawn at least two to four inches (five to ten cm) tall. Cut it whenever it is three to six inches (7.5 – 15 cm) tall. How tall you choose to grow the lawn depends on your own sense of aesthetic and what the lawn is being used for.
4b. Blades
Simply put, sharp blades are better. Duller blades rip the grass; sharp blades cut it cleanly. Tearing the grass instead of cutting it makes it more susceptible to disease and heat and drought stresses. Sharp blades save fuel and reduce the stress placed on the grass by mowing it. They also make the mowing process cleaner, resulting in a better looking lawn, and make the process more efficient, reducing stress on the mower and the grass. Sharpen or switch out your blades regularly.
Whether you chose a mower with a rotary or reel blade is up to you. Rotary mowers require a power source – either fuel or electricity – and reel blades do not. Reel blades are better on level ground, whereas rotary blades are better for uneven ground. Rotary mowers require marginally more maintenance, but a mulching mower will be less work in terms of raking. Consider your requirements and your lawn’s size and shape when choosing a mower.
4c. Bagging and Thatching
Grass clippings can add as much as 1 pound of nitrogen per 1,000 square feet (.45 kg per 90 m2) in a year, which is a simple way to add fertilizer for free. Mowing often and watering properly allows you to leave clippings on the lawn, minimizes the need for fertilizing, and saves money. It’s best to use a rotary mulching mower in order to achieve this, but if you are mowing frequently enough that clippings are small, any mower will do.
It is up to you whether to bag your clippings or allow them to form thatch. Thatch is the partially decomposed layer of grass between the soil and leaves of turf plants. It is composed primarily of roots and rhizomes. Mulching grass clippings can help the production of the thatch layer, provided the grass is not overly fertilized and growing too quickly. A thin layer of thatch, augmented by grass clippings, is quite good for the lawn’s health and resilience to foot traffic. However if the thatch layer is allowed to become too thick, it can prevent water and fertilizer from reaching the roots, and harbor insects and disease. If the thatching is becoming overly thick, use a wide leaf rake to vigorously rake out clippings and thatch after a mowing.
5. List of Turf Varieties
 The following table is a comparison of four types of turf grass, and is intended assist you in determining what kind of mix you wish to use in your lawn.
| Kentucky Bluegrass | Rough Bluegrass | Perennial Ryegrass | Tall Fescue | |
|---|---|---|---|---|
| Height (in) | 2 1/2 to 3 1/2 | 1/2 to 2 | 2 to 3 1/2 | 2 1/2 to 3 1/2 |
| Texture | Fine | Fine | Medium | Coarse |
| Best soil pH | 6.0 – 7.0 | 6.0 – 7.0 | 6.0 – 7.0 | 5.0 – 8.0 |
| Shade tolerance | Poor | Good | Fair | Good |
| Drought tolerance | Poor | Poor | Poor | Good |
| Heat tolerance | Poor | Fair | Fair | Good |
| Hardiness zone | 3 | 3 | 3 | 4 |
| Style | Spreading | Spreading Stolon | Bunching | Bunching |
| Hardiness | Moderate | Fair | Good | Good |
6. Final Word
 I hope this guide to lawn care has proved enjoyable and informative. A properly cared for lawn can be aesthetically beautiful and quite functional. It is a major facet of the modern suburban garden. A green lawn stretching across the garden is inviting as a place for quiet reflection or raucous play. It serves to tie together the garden’s disparate beds.
When you are facing lawn problems, you can certainly find some efficient lawn care service or lawn care company. They will provide an efficient lawn care maintenance through lawn treatment. On the other hand, you can always find some efficient home remedies for lawn problems.
By properly establishing the lawn’s foundations, and ensuring good soil quality and a healthy mix of cultivars for your region, you can have a vibrant lawn that does not require a great deal of lawn care work to maintain.

