How To Grow Celery
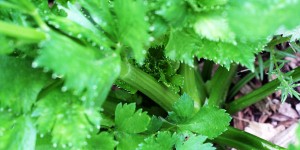 People first learned how to grow celery in ancient Greece.
Learning how to grow celery can be a wonderful challenge for gardeners at every skill level. Celery is a somewhat fussy plant, but if you follow all of the steps in my guide on how to grow celery, you will be successful even if you are a beginning gardener who is just starting out.
There are certain aspects of how to grow celery that require a bit of trial and error, but if you stick with it and follow this guide, you will soon be harvesting delicious, juicy celery stalks to use in soups, salads, stuffing, and mixed vegetable dishes.
Celery is a wonderful plant to get to know in your vegetable garden. There are many varieties of celery, and once you master the art of how to grow celery, you will be able to explore a whole world of delicious, diverse kinds of celery. Stem celery can be eaten as soon as you harvest it. And you will find that, as with most vegetables, fresh celery harvested from your garden is much richer and more complex in flavor than store bought celery.
The celery you are used to finding at the supermarket will seem bland and tasteless in comparison once you bite into a celery stalk that has come from your garden. And you will have the added satisfaction of knowing that you raised that piece of celery from a seed, starting a few months prior!
There are three general categories of celery that are cultivated for the kitchen: stem celery (dulce variety), root celery or celeriac (rapaceum variety), and soup or leaf celery (secalinum variety). You can learn how to grow celery that is white or red. All three forms belong to the same species and can therefore cross pollinate if they are grown close to one another.
If this is your first time learning how to grow celery, then I recommend choosing a cultivar from at least two of these categories. That way you can have a higher chance of success than if you just try to learn how to grow one kind of celery at a time. Or, you may want to keep it simple and just grow one kind of cultivar. If that is the case, I have some recommendations as to which kinds of celery are easier to learn how to grow than the others. You should start out with one of these.
More experienced gardeners may want to try their luck with some of the more difficult varieties, and they certainly can. But even expert gardeners may want to learn how to grow celery by starting with some of the easier cultivars first.
This guide will provide all of the information you will need in order to learn how to grow celery successfully in your garden. First, I will cover the different kinds of celery and discuss cultivars of each kind. These include Celeriac, which is grown for its edible roots, Golden Celery, Soup Celery, White Celery, and Red Celery. If you are a beginner who is just starting to learn how to grow celery, I highly recommend going with Red Celery, as it is one of the least fussy and easiest kinds of celery to cultivate.
Then I will discuss the best conditions in your garden for how to grow celery. I will explain how to prepare the garden bed so that it is full of nutrients, has the right soil pH, and is properly drained and warm enough for how to grow celery. It is very important to prepare the bed properly before planting, because after the celery plants are in the ground, you will not be able to do much in terms of soil amendment.
Then I will explain how to grow celery from seed indoors and how and when to transplant it into your garden. This is also an important section that you should pay close attention to. Properly transplanting seedlings is key to ensuring they grow into healthy, robust plants. Following that is a section that details how to take care of your celery plants. Moisture and food are very important to growing celery plants, and you should take care to provide both in even but sufficient amounts. Finally I will explain how and when you can harvest your celery for use in the kitchen.
Are you ready to get started on learning how to grow celery? Let’s go!
1. Kinds of Celery
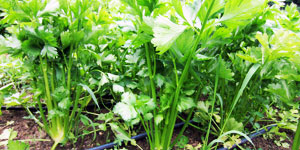 Celeriac, also called knob or turnip root celery, is grown primarily for its roots, although its stems are also perfectly edible. There are several heirloom varieties of celeriac, and most of these are quite large, weighing three or four pounds each. Among these are Giant Prague and Early Erfurt. These are not very well suited to small backyard vegetable gardens, or if you are just learning how to grow celery, as they need a lot of room to flourish, and they are not as easy to grow as the Apple Shaped Celery. This is a dwarf cultivar of Early Erfurt, and it has small leaves, purple stems, and a very round and smooth root that is about the size of an orange. It has an excellent flavor to its root, and there is less waste because the root is easy to pare. This is a great variety for gardeners who are learning how to grow celery.
One of the best varieties of celeriac, in my opinion, is a little plant with a big name: Tom Thumb Erfurt Turnip Root Celery. The celery root itself is about the same size as a walnut. This is not a true dwarf celeriac, but a bonsai celeriac. It is wonderful when added to mixed vegetable dishes, and it is just the right size to be a great garnish. Unfortunately, the seed is quite scarce, so it may be somewhat difficult to find in the United States.
Golden Self Blanching Celery is one of the best of the self blanching varieties. It was introduced in 1886, and it produces thick, crisp, deeply ribbed, tasty celery that does not have too much stringiness. This was the celery that earned Kalamazoo, Michigan the nickname “Celeryville.” This is a good cultivar for small backyard gardens and gardeners who are learning how to grow celery. It is smaller in size than other self blanching varieties and is not as prone to producing hollow stems. As the celery matures, the stems change from pale green to yellowish white without the need to bank up soil or resort to other types of covering. It does particularly well on low, damp ground. If you have an area in your garden that floods during the summer rains, this is an excellent vegetable to plant there. It comes to maturity in about the middle of October.
Golden Yellow Celery was developed by a market gardener in Issy, France, in the 1870s from a variety called Sandringham. This was one of the first self blanching celeries to appear commercially and it caused what the Revue horticole called a “revolution” in celery cultivation. Long known in Europe as Chemin’s Celery, after the market gardener who developed it, it is called Golden Yellow Celery in the United States.
This variety is characterized by yellow leaves and stalks that are almost lemon in color. It grows to a height of roughly two feet, at which point the tips of the leaves turn golden yellow. The plant’s stems are naturally white, but they can be made even lighter and more tender by banking up soil around them. Of all the old French varieties of celery, this is one of the most decorative, the easiest to grow, and the least bothered by aphids. Golden Yellow is a good variety for those of you who are just starting to learn how to grow celery.
Giant Pascal Celery is one of the finest large ribbed varieties to be cultivated. It was introduced in 1890 and immediately became very popular among commercial growers due to its size and flavor. The celery was developed in France as a selection of Golden Self Blanching celery. It therefore blanches even more easily than its parent variety, and turns white in a matter of a few days.
The plant grows to a height of about two feet and it has light green leaves on huge, two inch thick stems with a nutty and somewhat butternut like flavor. In spite of the thickness of the stems, this celery is not stringy, but if it is not kept sufficiently watered, the stems will likely become hollow or dry, a drawback that is common with large stemmed varieties. Giant Pascal Celery should be raised as an early fall crop because it will not store well over the winter.
Red celery has been grown in the United States since the eighteenth century, but for the longest time it was limited to the gardens of the well to do, for it was always considered a gentleman’s vegetable. I do not know exactly why this was the case: it is easy to learn how to grow celery classified in the Red variety, and in the Northeast it winters over with no more protection than a thick covering of hay. Red celeries are well known among celery connoisseurs for their rich walnut flavor, but if they are not properly banked up, or if they are raised in the intense heat of the Deep South, this delightful quality will quickly turn to bitterness. Red celeries are vegetables best grown in cool, moist weather.
There are a number of red celery heirloom varieties available among seed savers. One of my favorites is the plain old kind from the eighteenth century. It is simply called Red Celery, because its original cultivator is as unknown as the means of its development. Red celery, when freshly harvested, has stems that are a wine red that is deeper or lighter depending on the soil. Its leaves are dark green. The plant grows to a height of eighteen inches or so, but it will grow a bit taller if it is properly banked up with soil. If you earth it up only slightly the stems will turn pink on the bottoms but stay red at the tops.
The stems of red celery are not thick like the commercial celeries of the supermarket, but the flavor is very intense, and it will hold its color when cooked. There is a great look to this celery when it is used in salads, in mixtures of cooked vegetables, and alone when poached as a vegetable entrée. It is also excellent in soups because it does not get soft when it is cooked, and the leaves can be used like Italian parsley. Red celery takes us back to the point in its cultural development when it was still a vegetable with character rather than reduced, as it is today, to a pale, watery garnish. That is one of many reasons why this variety is a good place to start if you are learning how to grow celery.
Soup Celery is commonly sold as “wild” celery, but do not be fooled: the term is incorrect and causes a lot of confusion because there is a true wild type celery in North America that is not the same plant. Wild celery is Vallisneria Americana, a North American herb that grows along coastlines and produces a seed that wild ducks love to eat. Connoisseurs consider ducks that eat wild celery to be a prize game because of the flavor the seed gives the birds when they are cooked.
The wild celery of Europe grows in salt marshes in coastal areas. It is weedier than soup celery. It is also smaller and has a much darker leaf. The two will cross pollinate, however, because they do belong to the same species. Soup celery is best described as a wild celery that was brought under control and transformed into a dignified pot herb through long and careful cultivation. Its leaves are similar to those of parsley, but it has an intense flavor, similar to celery seed. There is also a salty aftertaste to the leaves of soup celery.
The plant grows in clumps and can reach two feet in height. Six or eight plants are usually enough for a small kitchen garden and will supply greens almost year round if raised in a cold frame. This is a great variety to learn how to grow celery with. The more soup celery is pruned, the better it thrives. The leaves are simply essential to soup stock and have historically been a key ingredient to herbal soup bunches.
White Plume Celery was introduced in 1884 by the Peter Henderson Company in New York. It is a varietal developed from Golden Half Dwarf celery, and upon its arrival it was quickly seen as an important addition to the vegetable garden. It because the leading self blanching variety among American gardeners, and is a favorite of restaurants and hotels for its highly ornamental character.
Part of the charm of this plant lies in its dwarf habit, which is almost twelve inches in height, and the compact arrangement of its stems. The stems are white, and the yellow leaves have a fine, fern like or feathery quality that is quite unlike common celery. The eating quality of the celery is very good, since it is crisp and snaps like an apple. However this celery does not store very well and its crop value declines toward the end of December. In the nineteenth century it was a popular Christmas vegetable. This is a good variety for advanced gardeners who want to learn how to grow celery that is a bit fancier than other kinds.
2. Best Growing Conditions For Celery
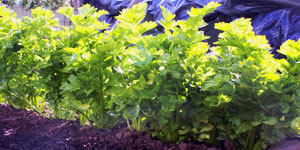 Celery is a cool season crop. You can learn how to grow celery in most areas of the United States. If you live in the Pacific Southwest – that is, Southern California – or in the Deep South of the United States, you can learn how to grow celery during the winter months. In the Upper South and the Northern United States you can learn how to grow celery as an early spring or late fall crop.
Celery grows best in full sun but will also tolerate some shade. Keep this in mind when you are selecting your site for how to grow celery. Make sure you are not planting it in an area that gets too much shade during the day. And when you are planning out your garden, make sure the celery, which will grow up to two feet at most, will not be shaded out by bigger plants to the south of it. In the Northern hemisphere, summer shadows tend to fall on the north side of plants and other objects, because the sun is still predominantly in the Southern sky. Plan your garden accordingly. You may want to plant shade tolerant vegetables, such as greens or root vegetables, on the north side of your celery.
Celery needs rich, moist soil and mild, even temperatures. And condition that can interrupt its growth will cause problems. You will need 120 to 140 days to produce a crop. Because it is so slow growing and delicate, learning how to grow celery can be a bit of a challenge, and it is often only taken on by experienced gardeners. But if you are a beginner, and still want to learn how to grow celery, you should not let that dissuade you. If you choose one of the easier kinds to learn how to grow, such as red celery or soup celery, you should be successful if you take good care of it and follow the steps outlined in this guide.
When you are preparing a garden bed for how to grow celery, there are three main things you should keep in mind: moisture, warmth, and food. While it is germinating and still a small plant, celery needs plenty of moisture and warmth. While it is growing, celery needs moisture and food. One of the best ways to meet all three needs is by making a raised bed. This is a common practice among expert gardeners that solves a number of problems simultaneously. Raised beds that have been deeply dug and enriched with well finished compost hold water better, but still drain well so that oxygen levels are optimal. Nutrients in a raised bed are part of a living system of decomposition and uptake so that plants can use them as needed. The soil in raised beds warms up much more quickly than soil at ground level, so you can plant your celery or other vegetables sooner and be certain they have the right amount of warmth to germinate and grow properly.
Before you plant celery, I recommend amending the soil to make sure that it is rich and full of nutrients. If you have a compost pile, work well finished compost into the upper six to twelve inches of the soil. It is best to do this a few months before you intend to plant your celery. That will allow the nutrients in the compost to leach into the soil over the weeks leading up to when you are ready to plant the celery.
Compost is an important part of maintaining soil fertility. The plants in your garden are the actors responsible for taking nutrients from the soil: in practical terms, every part of the plant was once an element or molecule in the soil. And unless those elements and molecules are returned to the soil, you will find yourself buying synthetic fertilizers to make up for them. But if you compost the plants growing in your garden, you can return those elements and molecules to the soil yourself. This will greatly reduce the need for outside sources of soil nutrients. Once you have a healthy compost pile going in your garden, you will be able to create a self sustaining system that consistently maintains nutrient levels and soil richness year after year.
Celery grows best in soil that has a pH level of 6.0 – 7.0. This is ever so slightly on the acidic side of the scale (7.0 is neutral). You can find out what the pH level is in your garden beds with a simple home test kit that is available at most gardening supply stores. You can test the soil’s pH in just a few minutes with these kits, and they do not cost too much money. I recommend using one, because the time you spend testing your soil’s pH will be time well spent.
In all likelihood the pH of your soil should be pretty close to neutral, and it may even fall right in the perfect range for celery. Fortunately, the best pH range is more or less the same for the majority of vegetables grown for food in gardens. So unless your soil’s pH is drastically higher or lower than this range (and that shouldn’t be the case), you probably will not have to correct its pH. Generally in the United States garden pH is slightly on the lower end if it isn’t optimal.
Raising the pH of the garden bed is a simple matter of adding lime to the soil. One of the best ways to do this is to add ashes to the soil. Wood stoves and fireplaces are great sources of ash. If you don’t have one, hopefully you have a neighbor who does. Wood ash is loaded with a number of nutrients like potassium and calcium that are important for healthy plant growth, and also can quickly correct low soil pH. Add five pounds of wood ashes per 100 square feet. Work it into the top four inches of the soil, and then water the soil liberally to help the nutrients in the ash leach into the garden bed.
3. Planting Celery
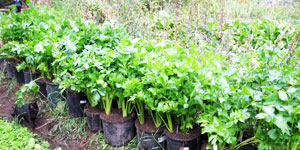 One of the best means of how to grow celery from seeds is to start it indoors. Start celery seeds indoors ten to twelve weeks before the last frost date in a small starting flat. A tofu container works great for this purpose if you do not have a dedicated seed starting flat. Sow the celery seeds on top of a compost based potting mixture and lightly cover them with very finely granulated potting mix. Celery seeds need light in order to successfully germinate, so you should be careful not to cover the seeds to deeply with the potting mix. Moisten the potting mix thoroughly, but do not over-water it. Cover the seed starting flat with a layer of clear plastic (plastic kitchen wrap or a clear plastic bag will both work just fine). The plastic will help keep moisture in the starting flat as well as maintain even soil temperatures.
Place the flat in a warm area with indirect light. For the best results, keep the temperature of the seed starting flat between 65 and 75 degrees F. Germination can be a bit erratic for a number of different reasons, but you should start to notice seedlings appearing in about seven to ten days. When the plants have begun to sprout, remove the plastic cover and move the seed starting flat to a warm, sunny place. Be sure to keep the soil evenly moist. Transplant the seedlings to two inch growing cells when the first two true leaves develop. You can use just about any small container as a growing cell if you do not have your own. Paper coffee cups or cardboard egg containers work particularly well in my experience. Or you can buy Jiffy Pots. These are biodegradable seed starting pots that you can later plant directly in the garden bed, which is useful to minimize transplant stress on the young celery plants.
Once the celery plants are about four inches tall, begin placing them outdoors during the day in order to harden them off once the danger of frost has passed. If the weather remains fairly cool, place the seed pots in paper bags and close the tops of the bags. After a week or so of hardening them off during the day, leave the pots, in paper bags, outdoors overnight. After two or three nights, they will be ready to transplant into the garden bed. Make sure, however, that the plants are not exposed to temperatures near freezing while you are doing this. If there is a danger that the nighttime temperature will drop below 50 degrees F, bring them inside overnight. If the celery plants are exposed to several cold nights in a row, they may produce seed stalks instead of edible petioles.
Before you transplant your seedlings, warm the soil in the raised bed by placing black plastic mulch over it for a week prior to planting. Black plastic mulch is available at garden supply stores and is not very expensive. It can also be used for several years because it is fairly heavy duty. The black plastic mulch will not only warm up the soil but also delay or prevent altogether the sprouting of any weed seeds that may be in your garden bed. This is important because juvenile vegetables are vulnerable to weed invasions until they become established.
The soil temperature in the garden bed should be at least 55 degrees F before you transplant the seedlings. When you are ready to plant, space your transplants six to ten inches apart in rows two feet apart. Dig a hole that is slightly larger than the root ball or Jiffy Pot, and gently place the celery seedling in the hole. Gently tamp soil around the base of the plant’s root. If possible, transplant them on a cool, cloudy day to reduce their water intake and the shock of being transplanted. The plants should be watered after transplanting if the soil is at all dry. Celery seedlings should be covered with floating row covers for the first month after transplanting to protect them from cooler nights.
4. Taking Care of Celery Plants
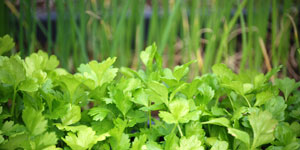 Growing celery needs plenty of plant food and moisture to grow best. The key to how to grow celery that is healthy and robust is plenty of organic matter. Celery has a small root system, but its roots are also quite dense, and it grows best in soil that is rich in organic matter. You should have already added plenty of well finished compost to your raised bed as discussed in section 3. When you are transplanting the seedlings, it is also a good idea to add a bit of compost to the planting hole, and provide a side dressing of compost and liquid fish and seaweed fertilizer during the growing season.
If you are using a synthetic fertilizer, you should fertilize it with a complete 15-15-15 fertilizer every two to three weeks. Water the celery plants regularly and thoroughly to keep the soil evenly moist. Remember that celery in the wild is endemic to coastal areas and marshes; with that in mind, you can understand why it needs a steady supply of water and nutrients.
Do not water your celery bed with a sprinkler or overhead spray during sunny days in the afternoon or late morning. Water droplets that gather on the leaves and stalks of the plant can cause the sun to burn it. Instead, water in the early morning or late evening. You can put a sprinkler on in the evening for about an hour every day or every other day to make sure that your plants are evenly watered. Of course, if you get good rainfall, you can adjust this schedule accordingly.
Because the roots of the celery plants are very near the surface of the soil, you should keep the patch weeded, but avoid cultivating the soil too deeply. Use a sharp hoe to cut weeds out below the surface, or pull them out by hand using a garden fork for greater leverage. Do not let weeds get out of hand, as they will be harder to deal with when they are bigger or more numerous. It is a very good practice to mulch heavily around the celery plants with garden detritus or wood chips. This helps keep sunlight from reaching weed seedlings and prevents them from gaining a foothold. Mulch will also help keep the soil surface moist.
Aphids and leaf cutting worms are the main pest problems that celery is prone to. Keep an eye on the plants for the symptoms of leaf cutting worms and aphids, and check them regularly to see if any appear. You can get rid of them using botanical insecticides. Leaf cutting worms can easily be removed and killed by hand, and aphids can be washed off the plants using a spray of soapy water and a sponge.
When the celery plants begin to get big, you should mound soil around their bases to keep them upright and help them to blanch. Do not mound soil more than a third of the way up the plant. Any soil that gets into the center of the celery plants can cause the plant to rot and will be very difficult to remove without breaking the stalks apart.
Self blanching varieties do not need much assistance, but you can help them along by excluding light from the petioles by wrapping them with brown paper. Blanching induces a change in color but does not much affect the plant’s flavor.
5. Harvest and Storage Of Celery
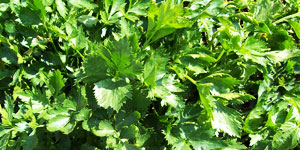 Knowing when celery is ready to be harvested is one of the trickier aspects of learning how to grow celery, as it is primarily a matter of personal experience that is difficult to impart in a gardening guide. Celery should never be planted so early in the spring that it begins to mature during the hottest part of the summer. Doing so will only cause it to become tougher, and if the summer heat is really stressful to the plants they may very well bolt and go to seed in the first year. The best time to plant celery for a good harvest is the end of May or in early June, but each area of the country has its own micro-climate that will dictate not only planting times but also harvest times.
Ideally, you should plant celery so that it comes to perfection in the fall. A light frost will not hurt established celery plants. But if you leave celery in the ground for too long, the stalks will become dense and stringy. A certain amount of trial and error is the best way of learning how to grow celery to the perfect harvest. For beginner gardeners who have never learned how to grow celery before, I recommend staying away from fancier, thicker stemmed varieties. Go ahead with red celery and soup celery. They will be hardier and easier to grow and harvest.
You can begin harvesting stalks from the outside of red celery whenever you feel they are big enough to suit you. This is usually around 120 days after planting. You can harvest entire plants by cutting them below the soil line. Celery will still taste good even when it has not reached its full maturity, so do not be scared of digging up plants that are still a bit small.
For best flavor and the longest storage potential, water celery the day before you plant to harvest it. It will keep in the refrigerator for a couple of weeks longer than it will in the root cellar (if you have one). Celery also freezes well: just cut it up and put it into a pint sized freezer container. In the middle of winter, add it to a vegetable soup right out of the freezer and let it simmer.
Celery for seed saving should be planted out after the threat of frost has passed. At least eight plants should be selected for this purpose, but if possible, twice that number is best. Once the plants flower and turn yellow, check the seed heads. When they turn brown, they can be rubbed onto sheets of paper. Let the seeds dry for two weeks before storing them in jars. Celery seed will remain viable for up to eight years.
Now that you know how to grow celery, you just have to get started!

