How To Grow Cabbage
 In this guide, we are going to learn everything there is to know about how to grow cabbage.
Learning how to grow cabbage will open up a big world of potential additions to your garden.
Did you know that the cabbage family is not limited just to the head cabbage varieties you are used to, but also includes certain greens like kale and collards, as well as broccoli, cauliflower, and more?
Cabbage is a wonderfully versatile plant, and has many uses in the kitchen as well; it can be pickled or made into coleslaw and kimchi for long term storage, or baked into cabbage rolls or soups.
Learning how to grow cabbage will open up not only your garden but also your kitchen to many wonderful new things.
In the first section of my guide on how to grow cabbages, called All About Cabbage, I will talk about the history of the cabbage family. Then I will talk about certain physiological aspects that are important to understand if you want to know how to grow cabbage. I will discuss the four major groups of cabbage, and recommend a few varieties that I have enjoyed growing in my garden.
In the next section of my guide on how to grow cabbage, called Planting Cabbage, I will explain how to get your garden bed prepared so that it will be ready for how to grow cabbage heads that are healthy and produces excellent heads, including double digging the garden bed, tilling compost into it, making raised beds and testing and correcting the soil pH. Then I will explain how to start cabbage transplants indoors, and how you should transplant them for both early spring and late season plantings.
Following that section is Maintaining the Cabbage Patch, in which I will explain the various aspects of caring for your cabbage patch, including how often to water the patch, how to monitor the amount of water your patch is receiving, and common problems associated with growing cabbages. Finally I will discuss harvesting your cabbage crops and how to grow cabbage over the winter for harvesting seeds.
Sounds like fun, right? I think you will enjoy everything we are going to learn about this wonderful, versatile family of vegetables, and that you will have lots of fun learning how to grow cabbage in your backyard garden. Let’s get started.
1. All About Cabbage
 In this section of my guide on how to grow cabbage, I will describe the history of the plant and the Brassica family, which also includes broccoli, cauliflower, Brussels sprouts, kale, and kohlrabi. Then, I will discuss certain important characteristics of cabbages, and discuss different varieties of cabbage, along with recommending a few varieties that I have had success with in my vegetable garden.
Cabbage (Brassica oleracea, Capitata or Bullata groups) was originally developed by people who first learned how to grow cabbage by cultivating wild, leafy types that do not develop true heads, and are still found growing in and around Europe. Wild cabbage can be found growing along the chalk coasts of England, Denmark, northwestern France, and a number of other areas from Greece to Great Britain. All of the members of the cabbage family (Brassica), including cabbages, broccoli, Brussels sprouts, kale, and cauliflower, trace their origins to this region, and the Celts were the first people to learn how to grow cabbage and its cousins. Because of this, their language – Gaelic – gave us the words we use to describe these cultivars today. The Gaelic word kol became Kohl in German and kale in English. The Gaelic word bresic became the Latin word Brassica, and the word kap eventually became the English word cabbage.
Cabbage was widespread and most people in Europe, Asia, and the Middle East knew how to grow cabbage by 2000 B.C. The ancient Romans were very familiar with cabbages and cultivated a number of different varieties. The Roman’s cultivars fell into three general categories: a kind with curly, crinkly leaves that was similar to the kale we eat today; a headless variety with smooth leaves similar to open-headed varieties of today; and a wild variety that had small round leaves that were not unlike collards of today.
Some historians believe the ancient Egyptians even considered cabbage a sacred vegetable and may have worshiped it. Cabbage was used throughout Europe by about 900 A.D., but people did not know how to grow cabbage that produced a true head until at least the sixteenth century. The head types of cabbage were not described in gardening tracts until 1536.
Shortly after this, European settlers brought heading cabbages with them to the Americas. They have spread throughout North and South America, and are often grown in backyard gardens. Learning how to grow cabbage is fairly straightforward, and the vegetable has a wide array of uses, which makes it a popular cultivar. Today, cabbage is featured in cuisines around the world, and is a staple in many of them.
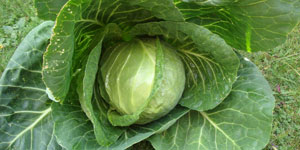
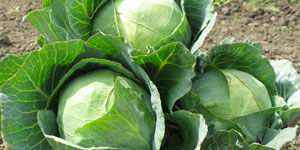
Cabbage types vary widely. They can range in color from light green to dark purple; they can vary in leaf character from very smooth to savory leaves; they can fluctuate in head shape from flat to pointed; and they can range in dates to maturity from early (just 55 days after transplanting) to very late (up to 130 days or more after transplanting). The most common types – the ones most people identify as cabbage and are familiar with in supermarkets – are the green, round headed types.
Cabbage is a biennial plant, which means it needs a cold treatment in order to flower. If you simply want to know how to grow cabbage to harvest it for its greens, you will only need to plan on one growing season. But if you want to know how to grow cabbage in order to collect and save its seeds, you will have to plan on leaving it in the garden bed over the winter and allowing it to continue growing the following season. I will cover how to grow cabbage for seed saving later in this guide.
Cabbage is a cool season crop that will tolerate frost but not extreme heat. In the fall South of the United States, and at similar latitudes, it can be grown in fall, winter, and spring, but not during the summer months. In areas that experience mild frosts, it can be planted in the late fall and will be one of the first crops you will harvest from your garden in the following spring. On the Pacific coast, and in other areas with a similar climate, cabbage can be grown all year long. Cabbage will adapt to cooler temperatures and it can withstand short periods of temperatures that drop below 0 degrees Fahrenheit (-18 degrees Celsius). In Northern latitudes, cabbage can be grown as an early summer crop or as a late fall crop.
1a. Cabbage Varieties
There are four basic categories into which cabbages in the B. oleracea family should be classified. These are the Capitata group, the Bullata group, the Tronchuda group, and the Acephala group. Of these four groups, cultivars in the Capitata group are those that you were probably thinking of when you began looking into how to grow cabbage, and so my varietal recommendations for that group will be more extensive than those for the latter three groups.
Understanding the characteristics of each family will help you to decide how to grow cabbage that suits your individual tastes as well as your intended use for it. If this is your first time learning how to grow cabbage, I recommend planting at least one cultivar from each category, so that you can experience the differences among them first hand. Then, when you know which category’s characteristics best suit your tastes, you can focus on that category in the future, and learn how to grow cabbage varietals included in it.
1a1. Capitata group
This group includes all cabbages that form true heads, and this is probably the group that most readers will be familiar with. Within the Capitata group, there are three further subgroups: the Wakefield group, which produces cabbages with pointed heads; the Copenhagen group, which produces cabbages with rounded heads; and the Drumheads, which produces cabbages with very broad, flattened heads.
Early Golden Acre is a very commonly grown cultivar in this group, and if you are just learning how to grow cabbage this is a great one to start with. It grows a tight, bright green head that is six to twelve inches in height and weighing three to four pounds. It produces early and does so uniformly. This is a great cabbage for stir fries or coleslaw. 64 days to maturity.
Charleston Wakefield is one of the shorter season Wakefield varietals and produces a larger head than some of the other Wakefield varietals, weighing in between four and six pounds. The head is not super tight, and is pointed like other Wakefield varietals. 70 days to maturity.
Copenhagen Market is an heirloom varietal that produces rounded heads that are six to eight inches in diameter, weight three to four pounds, and rarely present problems such as bursting. 70 – 100 days to maturity from transplanting.
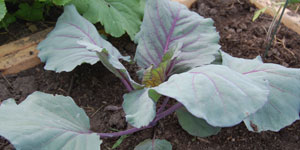
Red Drumhead is a great one to start learning how to grow cabbage with as well. This is one of the most reliable cabbages you can grow, and is minimally fussy. It produces large sized round heads with reddish purple leaves that are wrapped tightly around a solid heart in the center. At maturity, these cabbages are twelve to sixteen inches in diameter and weigh four to six pounds. 70 days to maturity.
1a2. Bullata group
Also called the Savoys, this group includes all cabbages that form leaves that are blistered or puckered. The head shapes of Bullata cabbages come in a wide variety, and can be very loose and leafy, or grow very large drumhead cabbages.
Alcosa baby savoy is one of the prettier cabbages you can grow, with wrinkled, crinkly leaves that have a bluish hue on the outside, a six inch, bright green head, and a buttery yellow interior. Early spring plantings will mature in only 65 days, and you can replant in late summer for a fall harvest.
1a3. Tronchuda group
Also called Portugal cabbages, Galician cabbages, or Braganza, this group produces thickened stems that are not unlike celery stalks. Varietals from the Tronchuda group are not well known in the United States and Canada, but are more common in Spanish and Portuguese cuisine. Tronchuda cabbages tend to be sweeter and tenderer than Bullata or Capitata varietals.
Couve Tronchuda is a bright green, cabbage with a loose head that has wide spreading leaves and fleshy, large white midribs. You can either allow the plant to mature and harvest the entire vegetable, or simply strip outer leaves from the plant, which will generate more growth in the center. The leaves in the center are lighter in color, have frilly sides, and have a flavor that is milder than that of the outer leaves. Tronchuda can be grown in a variety of different climates, but is a particularly good choice for Southern states, as it can tolerate heat spells and will overwinter through light frosts. The traditional Portuguese soup, Caldo Verde (“green soup”) is made from this variety. 85 days to maturity.
1a4. Acephala group
This group includes collards, rose-headed kales, cow cabbages, and tree kales: many of the oldest cultivated cabbage varietals belong to this group, and their characteristics have the most in common with wild cabbage types. Many cultivars in this group are particularly hardy and not difficult to grow, although most people do not tend to think of them as true cabbages.
Black Tuscan Palm Tree Kale dates from the 1700s and was originally cultivated in Tuscany. This varietal is winter hardy even in northern latitudes of the United States; I have successfully overwintered it in my garden for a number of seasons. It grows two to three feet tall, and should be spaces two to three feet apart. It will grow a rather open crown of leaves not unlike a palm tree, with dark green, wrinkled leaves. 85 days to maturity.
Green Glaze Collards are one of the more common heirloom varietals of collard greens, and were developed in Pennsylvania in the early nineteenth century. This varietal has leaves that are bright green with a yellowish hue and a slightly waxy surface. The waxy surface forms a natural protection against cabbage worms that would otherwise eat the leaves. Mature plants are one and a half feet tall and form loose, leafy crowns that resemble lettuce. This varietal is somewhat tender and will not successfully overwinter in climates that have very harsh winters; like most collard greens, it does best in Southern states. 79 days to maturity.
2. Planting Cabbage
 In this section of my guide on how to grow cabbage, I will explain how to get your garden bed ready so that it will be prepared for how to grow cabbage that is healthy and produces excellent heads, including double digging the garden bed, tilling compost into it, making raised beds and testing and correcting the soil pH. Then I will explain how to start cabbage transplants indoors, and how you should transplant them for both early spring and late season plantings.
2a. Preparing the Soil
The ideal soil for a bed of cabbage will be fertile, deep, friable, well drained, and high in organic matter. The exact type of soil in the bed is not as important provided the soil is well drained, adequately supplied with organic matter, and can retain moisture well. The kind of subsoil is also important. Hard shale, rock ledges, gravel beds, deep sand, or a hardpan under the surface is particularly undesirable. Fortunately, if you are faced with any of these problems, you can circumvent most of them simply by constructing raised beds that are adequately deep to provide good drainage for the cabbage.
Good water drainage is essential for how to grow cabbage that is not susceptible to disease. The garden bed should not be located in an area where there may be standing water after heavy rains. Good air circulation is also important. The bed, if possible, should be located on a slight slope that allows air to move downward to lower levels on the hill. This will allow the garden to escape early and late frosts, which is important when you are extending the life of the cabbage bed by planting early and late harvests, or if you are overwintering your plants for a seed crop.
To prepare the bed, till it or double dig the soil in the spring or fall. Fall preparation has several advantages over spring preparation: organic matter tilled into the soil decomposes more rapidly; insect and disease problems are reduced by burying them in the soil or exposing them to inclement weather; more water is absorbed; the physical condition of clay soils improved by exposing them to frost action; the soil can be worked and planted earlier in the spring; and the trapped air acts as insulation for increasing the survival of earthworms.
Fall preparation is particularly desirable when sod, manure, or a large amount of organic material is turned under. These materials will decompose during the fall and early spring and be of value to the cabbages you plant in the next season.
Spring preparation of the cabbage bed is desirable where soil erosion occurs, where shallow tilling is practiced, or in sandy soils. In the South, where conditions are hot and dry, you should consider mulching the soil after you have transplanted your cabbage seedlings.
Do not work the soil in your cabbage bed when it is wet. When you examine the soil to determine if it is dry enough to work, you should take samples both at the surface as well as a few inches below it. The soil may be dry at the surface, but the lower layers can still be wet. Soil that sticks to your shovel or tools is usually too wet. Shiny, unbroken surfaces of spaded soil are another indication of a wet soil condition.
To double dig the bed for planting cabbages, dig a trench down one side of it that is about a foot wide and eighteen inches deep. Fill in the bottom of the trench with about six inches of well-finished compost. Dig a second trench next to the first one, filling in the first one with the soil from the second, repeating the process until you have dug trenches down the length of the bed. Fill in the last trench with soil from the first. This method allows you to fill the bed with an adequate amount of organic matter as well as till the soil to a depth that will promote the healthy growth of your cabbages.
2b. Testing Soil pH
In order to find out what elements are deficient in your soil, you should test the soil. Cabbage prefers a pH of 6.0 – 7.5, which is around neutral but leaning toward alkaline. A test will indicate the amount and availability of nitrogen, potassium, phosphorus as well as the soil pH. A small amount of soil from six to eight representative areas of the garden bed (and more widely, the entire vegetable garden) should be collected, dried, and sent to the nearest county extension soil testing laboratory. The cost of this test is minimal as compared to the benefit it affords the garden, and you will receive a thorough report of soil nutrient quality and pH levels, as well as recommendations for amending the soil.
2c. Planting Cabbage
Quality assurance in cabbage is dependent upon making sure there is rapid growth of the plant. Cabbage responds well to liberal applications of fertilizer that is high in nitrogen. It should be fertilized before seeding, and a starter fertilizer should be used when transplanting your seedlings. Cabbage can be fertilized once or twice during the growing season, with at least three weeks between applications.
For early spring planting, transplants should be sed. If these transplants are hardened off, they can be transplanted into the garden at the same time you plant your earliest vegetables. Because cabbage does not tolerate hot weather well, cultivars that mature before you expect hot weather should be used. Cabbage transplants are spaced twelve to eighteen inches apart in rows that are about two feet apart. You can also plant fast growing vegetables such as green onions, early lettuce, and radishes between the cabbages to fully utilize the space. These other vegetables will obviously have to be harvested before the cabbage starts to spread out.
The stem of the cabbage transplants should not be any larger than the size of a standard pencil. Larger plants have more food reserve; and if they undergo low temperatures of forty to fifty degrees Fahrenheit (5 to 10 degrees Celsius) for more than three or four weeks, these plants will produce a seed stalk. Large transplants that are exposed to a low temperature during the winter will flower in the spring. Heads from plants that have been allowed to overwinter should be harvested rather early, unless you plan to allow them to flower in order to collect their seeds.
For late planting, seeds are planted one fourth to one half inch deep during midsummer or early fall, depending on the first frost date in your area. The plants should be thinned later on. Summer plantings will produce the head during the cooler fall weather. Late plantings can follow early potatoes, beets, peas, or spinach. Frequently, gardeners plant cabbage before the potatoes are harvested in order to conserve space.
A method of how to grow cabbage that provides for a harvest over a long interval is by planting different cultivars that have different maturity dates. Of the numerous cultivars that are available, many are resistant to one or more diseases. There are early and late cultivars of standard red, green, and Savoy cultivars available. You can also plant a few bumper crops of the same varietal, provided you ensure that later plantings will not reach maturity after temperatures typically rise above the mid seventies Fahrenheit (mid twenties, Celsius). Similarly, you can plant a few bumper crops that will successively mature through the fall.
Later cabbage plantings can be successful in northern latitudes with the addition of a cold frame to protect them from heavy frost. In this method, cabbages are planted about forty days before the first frost date in a raised bed that has walls. A cold frame for this bed can be easily constructed out of wood and plastic sheeting, or more elaborate cold frames can be built, depending on the amount of money you are willing to spend, the amount of work you want to put in, and aesthetic considerations.
To make a simple cold frame for how to grow cabbage through the late fall, construct a wooden frame that has the same dimensions as the walls of your raised bed, but with a crosspiece in the middle. Using nails or a staple gun, attach heavy, clear plastic tarps to the top of the cold frame, and simply place it over the raised bed. Alternately you can build a cold frame out of old double hung windows or French doors. Creatively made cold frames can help make your vegetable garden a more beautiful place.
3. Maintaining the Cabbage Patch
 In this section on my guide to how to grow cabbage, I will explain the various aspects of caring for your cabbage patch, including how often to water the patch, how to monitor the amount of water your patch is receiving, and common problems associated with growing cabbages. Finally I will discuss harvesting your cabbage crops.
3a. Water
Cabbage should receive a steady supply of water in order to grow robust heads, but you should avoid overwatering cabbages (or stop watering altogether) once the head is mature. The heads of early cultivars frequently split in hot weather. This is caused by too much water moving into the mature head. To reduce this problem, either stop the supply of water to the cabbages once the heads or mature, or else prune the roots of the plant. To prune the roots, the plant can be twisted to break some of the roots or the roots can be cut with a shovel or knife.
If you have not yet obtained a rain gauge for your vegetable garden, I recommend you do so. A rain gauge is a simple tool that, when left in your garden, will show you how many inches of rainfall the garden is receiving each day and week. In addition to this, as I have recommended elsewhere, it is a wise practice to start keeping a rainfall calendar. This way, you can keep track of how much rainfall your garden is getting all growing season long. Before the heads are mature and there is a risk of burst or split heads, the cabbage patch should be getting an even supply of one and a half inches of water each week. If rainfall has been sufficient, then that means less work for you; otherwise, you will have to supplement rainfall with watering.
Cabbage is one of several plants that you should avoid overhead watering with a sprinkler, for a number of important reasons. Because the leaves of the cabbage are the point of the harvest, water droplets that are left on the leaves during sunny days, and thus are able to concentrate the rays of the sun and burn the leaves will wreck the quality of much of your harvest. Instead, cabbage would do well from an underground drip irrigation system. This involves drip hoses that slink up and down the rows of cabbage and which you have covered with a generous layer of mulch. But be sure if you are using drip irrigation to set a timer or some other reminder so that you remember to turn it off after the proper interval. Cabbage root systems that are allowed to become waterlogged are susceptible to a number of diseases.
As always, I recommend hand watering your patch as one of the best – and my preferred – methods of watering. Hand watering can be a fair amount of work, but it provides the gardener working on a backyard scale with a manageable task. More importantly, it forces the gardener to get up close and personal with the garden, which allows them a better chance of noticing and stopping any problems before they get out of hand.
3b. Common Problems
There are several major diseases that attack all plants within the Brassica family. Fusarium wilt, commonly referred to as yellows, is a disease that is found in the upper South and the North. The lower leaves of plants that have been struck by this disease become yellow and turn brown. In areas where the disease is a problem, you can grow cultivars that are listed as yellows-resistant.
Black rot and black leg are diseases that are spread by diseased seeds or transplants, or by insects. Black rot results in yellowing of the leaves and blackening of the plant’s veins. Black leg causes dark sunken areas on the stems of young plants. The best control for how to grow cabbages that are free of these diseases is to plant disease free transplants and to purchase hot water treated seeds. Soaking your seeds in water at 112 degrees Fahrenheit (45 degrees Celsius) for more than 27 minutes will destroy the organisms that cause black rot and black leg. Cultivars that are resistant to black rot should be grown if this disease is a problem. Black rot can become a serious problem because once it infects the garden, no members of the cabbage family (broccoli, cauliflower, Brussels sprouts, kale, kohlrabi, etc) should be planted near that same area for at least three years, or they could fall victim to it as well. Crop rotation, destroying rather than composting diseased plants, and insect control are all highly recommended to help in disease control.
Club root attacks the roots of all of the plants in the cabbage group. As the name suggests, this disease causes the roots to become club-like in appearance. Once the fungus is established, it can live in the soil for fifteen years or more. The disease is transmitted by sick plants and infected soil.
The major insects that affect the cabbage family are cabbage worms of various types, including cabbage loopers, and cabbage root maggots. The adults can be grey, brow, white, or mottled moths. The adult you will most commonly see is a white moth hovering over or around the plants in the garden. The worms are light green or dark green and are found on the undersides of the plant’s leaves or at the base of the plant and can be controlled by picking them off the plants and drowning them in a bucket of soapy water. If the worms become a serious problem, you can control for them with an application of Bt (Bacillus thuringiensis) spray. It is important to be sure that you prepare a preparation of Bt according to the specifications on the label.
3c. Harvest
The heads of your cabbage crops can be harvested any time after the head has become fairly firm. Heads from cultivars that mature in the fall can be harvested and stored for several months at 40 degrees Fahrenheit (5 degrees Celsius) at high humidity.
Cabbage planted early for summer harvest will produce a second crop of somewhat smallish heads. The center head is cut, leaving as many of the leaves on the remaining plant as possible. Small heads will develop on the stem near the base of the leaves. These heads are quite edible and should also be picked when fairly firm.
All of the plants in the cabbage family are able to interbreed. Because they are pollinated by wind and insects, in order to successfully harvest pure seeds requires only that you allow just that variety to flower for seed production at any given time.
Cabbage is biennial, which means they produce seed in the second year. In the southern parts of the United States, where winter temperatures seldom fall very far below freezing, cabbage can be mulched with hay over the winter and cleared off in the spring. In parts of the country where the temperature stays lower than that in the winter, you will have to bring in the plants to overwinter in a cool, dark place, such as an unheated basement. To do this, dig up twenty or so plants from the fall crop and store them in damp dirt in five gallon buckets. When spring comes, plant them back outside again. To help the cabbages develop a flowering stalk, use a sharp knife to cut an X in the head. Once the plants have bolted, allow them to flower and develop seed pods. When the seed pods are tan, strip them off of the plant into a bag, and break them up, winnowing out the debris.
4. Final Word
Okay, now you know everything you need to know about how to grow cabbage in your backyard garden. By now you should have a pretty good idea of which kinds of cabbage you want to grow for your home use, and how to go about doing it. In this guide, we learned about the rich history of this wonderful vegetable, as well as the four major categories of cabbages: the Capitata group, the Bullata group, the Tronchuda group, and the Acephala group. Which one you pick for your garden depends mostly on your personal taste and what you intend to use it for, but remember that you should choose a variety that is right for your region and, if necessary, not susceptible to diseases. Then, we learned about how to prepare your garden bed for how to grow cabbage that is healthy and that does not suffer unnecessarily from disease or pests. Finally, we learned how to maintain your cabbage patch, including how often to water it, methods for watering, and how to deal with and prevent diseases. Last of all, we talked about harvesting your cabbage or growing it over the winter for seed harvest. Now that you learned everything about how to grow cabbage, good luck!