How To Grow Beets
 This is my guide on how to grow beets!
Learning the best way to grow beets is a fun, easy, and rewarding experience.
Beets are one of the few root vegetables that also have delicious leafy greens you can eat in salads or after sautéing them.
I recommend learning how to grow beets as a great project for any gardener, regardless of your level of expertise.
Beets are a delicious treat in the kitchen, come in a wide variety of shapes and colors, and are extremely good for your health!
For all these reasons, learning how to grow beets is a great idea.
In this guide, I start off in the section “All about Beets” by briefly explaining where beets come from and why people first decided to learn how to grow beets. In that section I will give a bit more detail about the nutritional value of beets, and cover some of the more popular varieties of beets, along with describing their qualities and growing season length.
Next comes the most important part of the guide, in which I will discuss how to prepare the soil for how to grow beets, as well as how to plant beets. As with many other root vegetables, preparing the soil correctly is probably the most important consideration.
Once they are established in the soil, beets will generally take care of themselves, provided the soil has the right pH and nutrient content, is properly double dug and aerated, and has the proper drainage. In this section I will describe how to test for soil pH, and the best ways to amend the soil pH content once you know what it is. I will then talk about how to properly double dig a garden bed for a root vegetable like beets.
I will explain why planting beets in a raised bed is a very good idea. Then I will talk about options surrounding how to grow beets indoors and transplant them, or simply how to grow beet seeds. Finally, I will discuss how to grow beets in several bumper crops at the end of the growing season, and how you can use cold frames to extend the life of your beet garden well into the late fall.
After that section, I will describe what you need to do to take care of your beet patch, although if you have correctly followed the preparation measures I talk about in section 3, you will find that beets do not require much work beyond that. Finally, I will describe how and when to harvest your beets, and how you can save seeds, if you are so inclined.
Let’s get started. I hope you enjoy my guide on how to grow beets!
1. All About Beets
 Beets, also called garden beets and table beets, along with Swiss chard, are variants on the same species (Beta vulgaris, or wild beets) that are commonly related to a type of sea beet that grows wild around the Mediterranean Sea. People originally began to learn how to grow beets in North Africa, Europe, and West Asia around the third century B.C., although they did not learn how to grow beets for their roots until the sixteenth century. Even then, beets did not become widely popular as a cultivar until the late nineteenth century. Until then, beets were primarily grown for the sugar content of the roots.
Though beets are grown for their roots and Swiss chard is grown for its leafy greens, the greens of beets are also safe to eat as well. Beets and beet greens are a health food dynamo. The roots contain a compound that has been shown to reduce certain amino acid levels in the blood that have been shown to be positively correlated to coronary artery disease, certain vascular diseases, and strokes. Because of this, learning how to grow beets and making them an important part of your garden as well as your diet is a great idea for your long term health.
In addition to this benefit, beets supply many important minerals, as well as B vitamins. Beet greens (as well as chard) are also an excellent source of vitamin K, which plays a important role in a number of physiological functions. They also contain vitamin C, beta carotene, and a number of other vital antioxidants.
Beets are a biennial crop, which means they need two years to complete their flowering life cycle. In the first year of growth, beets will only produce roots and greens; during this time they are storing food in the roots for the flower that will grow the following year. It is at the end of the first growing season that you will want to harvest your beets.
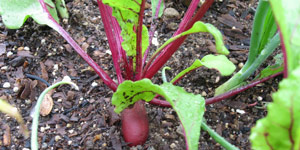
You can learn how to grow beets either for the roots or for the leafy green tops, or for both. Various cultivars have been developed that are categorized based on the shape and size of the root and the length of the growing season until they are mature. Beet roots are most typically rounded, but can also be flattened or extended. Their plump roots are typically red, but golden varietals are also available, along with beets that have red and white “bulls eye” patterns in the roots. Beets produce a small fruit that contains a few very small seeds.
Beets are adapted to all parts of North America, because they can tolerate both hot and cold temperatures. They will not survive severe frost and because of this they are cultivated through the spring, summer, and fall in the Northern latitudes. In warmer regions they can be grown through the fall and winter to be harvested in the spring.
Finally, not only are beets packed with beneficial vitamins and nutrients that are good for you, they also taste great! Beet roots are full of sugar, and this sweet quality makes them a lovely addition to your table in the form of soups, pickled beets, or simply as a boiled or baked dish. Beets have more than enough flavor and sweetness to allow them to stand simply on their own as a delicious side or main course.
1a. Beet Varieties
Given properly prepared soil beds, beets can be grown practically anywhere in North America where plants will grow. I have never tried to grow a variety of beets that was not delicious, though over time you may find that certain varieties will grow a little better or taste a little better in your specific growing region. I will give you a list of my favorite varieties, and I think you will find them very well suited to grow wherever you are in North America. That said, please do not limit yourself to only these suggestions.
Bull’s Blood beet has deeply reddish purple leaves which, as immature leaves, are a wonderful addition to salads. The roots are rounded and medium sized, with bright red outer skin and alternating red and pink rings inside. The roots are tasty and tender when harvested as babies. 35 days to maturity as baby beets.
Early Wonder beet is an heirloom beet that has tall, abundant greens, very flavorful, dark red roots, and is relatively quick to produce, with a time frame of 48 days to maturity. Great for mild climates where you want to grow multiple successional crops (see section 3).
Cylindra beets, also called Formanova beets, are an heirloom variety from Denmark. These produce long, cylindrical roots that are excellent for uniform slicing. Baby cylindra beets are also greatto eat, and harvesting them helps the remaining beets grow better. It has an excellent texture and a rather sweet flavor. 60 days to maturity.
Detroit Dark Red beets are almost perfectly round, up to three inches in diameter, and as the name suggests, very dark red – almost purple. Their greens are abundant, deep green, and are great if sautéed or if added to salads as babies. 60 days to maturity.
Regardless of the variety you choose for how to grow beets, if you follow the proper soil preparation, planting and care instructions as described below, you should be successful in your endeavor.
2. Planting Beets
 In this section on how to grow beets, I will explain how to prepare the soil in your garden bed for planting beets; what kind of pH is best for growing beets and how to test the soil pH in your garden bed for beets and other crops; starting and planting beets; succession planting; and how to grow beets from either seeds or transplants. This section will be the longest one in my guide on how to grow beets, because like many root vegetables, the most important aspects of growing all have to do with preparing the soil and correctly planting the beets. Once they have become established seedlings, there is very little to worry about other than making sure they are receiving enough water and making sure that you harvest them at the right time.
2a. Soil Preparation
Beets grow best in deeply dug, rock free soils that are rich in organic matter and have a pH between 6.5 and 7.5. The beds should be fertilized normally, though the addition of a quarter teaspoon of borax, mixed with something like bone meal or wood ashes for even distribution, per each 32 square foot bed, is a good idea because beets are sensitive to boron deficiency. One major problem with germination of beets is that soil can become crusted over the seeds, which can lead to plants being trapped underneath the crust. This will lead to uneven stands with different rates of maturity. To prevent this problem from occurring when you are learning how to grow beets, make sure there is plenty of well finished compost in the soil.
2b. pH Testing and Correction
If you have not yet tested the pH in your vegetable garden, I recommend that you do so immediately. pH is a measure of how acidic or alkaline the soil is. This is important because plants usually have a particular range of pH preference for optimal growth and because the pH of the soil actively affects which microorganisms will thrive in the environment and how readily the nutrients in the soil can be used by plants. The pH is measured on a scale from 0 to 14. Zero is highly acidic, and 14 his highly basic. 7 is neutral; beets prefer to be grown in soil that is close to neutral (6.5 – 7.5).
You can test soil pH yourself using a soil testing kit or a pH meter. The cost of pH meters for home use has dropped considerably in recent years, with accurate units selling for less than twenty dollars. Alternately, you can take soil samples from your garden beds and send them to extension labs for a more comprehensive testing. Labs will test not only the soil pH but also provide a full report of the nutrient quality of the soil, along with recommendations for correcting both pH and nutrient content. I always recommend testing soil pH and nutrient content when you are starting to grow vegetables anywhere, and learning how to grow beets is no exception.
Because pH corrections can take months to show results, and because the constant rotation of beds between crops makes it difficult to customize the pH of a bed to a particular crop, it makes sense to test each of your vegetable beds individually, and then correct all of the beds to a uniform pH of between 6.0 and 7.5. There are some exceptions which I cover in my other garden guides, but generally speaking this is a good rule of thumb.
In many parts of the United States, the soil pH is too low and needs to be raised to be within an optimal range. Correcting pH using lime can be problematic in that it takes several months to work. Though the gardening year should star in the fall along with any soil corrections so that the lime has time to react with the soil, the reality of life is that the decision to start a garden or dig a new garden bed is often made in the late winter or early spring. Thus the gardener is stuck with the task of trying to correct pH in a matter of weeks instead of months.
There are many liming materials available for this purpose, but I recommend four in particular: powdered lime, pelleted lime, dolomitic lime, and wood ashes. Others such as burnt and hydrated lime act more quickly but are hazardous to handle and easy to over apply. If you chose to use these latter products, you must follow package directions closely.
Pelleted lime is powdered lime that has been mixed with an innocuous water soluble adhesive for easier spreading. It acts no more or less quickly than the powered product but is slightly more expensive. Lime can take as long as a year to have a complete effect, but it will remain effective for as much as seven years.
Dolomitic lime contains magnesium in place of some of the calcium. In most soils in the United States, using dolomitic lime for up to about one quarter of the liming process is beneficial to supply needed magnesium along with calcium.
Wood ashes are a long neglected soil amendment for pH correction. They contain a wide array or macronutrients such as potassium and calcium but also contain elements such as iron, boron, and copper, all of which are important for how to grow beets that are rich in nutrients and vitamins. They act more quickly in correcting soil pH but do not last as long. In effect, then, I recommend using wood ash in conjunction with lime, rather than on their own, when you are preparing a garden bed for how to grow beets. Lime and wood ash can be worked into the soil while you are double digging the bed (see below), or you can till lime and wood ash into the top four to six inches of the soil. As you water the garden bed, the lime and wood ash will leach into the lower levels of the soil.
2c. Double Digging for Beets
I recommend that you add well finished compost to the soil the season before you intend to grow beets in a garden bed. In other guides, I have thoroughly explained how to double dig garden beds to add compost, and I recommend doing the same for beets. Double digging is a technique in which you dig a trench along one end of the garden bed that is about a foot wide and up to eighteen inches deep. For root vegetables such as beets, the deeper you double dig the bed, the better. After you have dug the trench, fill the bottom third of it with well finished compost and/or manure. Dig a second trench parallel to the first, filling in the first trench with soil from the second. Add compost to the bottom third of that trench, and fill it in by digging another trench parallel to the first two, working your way across the garden bed. Finally, fill in the last trench with soil from the first one.
Double digging to till in compost has several advantages. First, it allows you to break up the soil and remove any stones or compacted balls of clay that will prevent roots from moving freely through the soil. Second, it allows you to make sure a healthy amount of organic material is tilled into the soil at a depth from which it can release nutrients to the root system all season long. Third, it gives you the opportunity to till the soil so that it is broken up, which allows for better air circulation and leads to improved drainage. Fourth, the addition of organic matter before you replace the soil in the bed will naturally raise the bed. Raised beds are always better for vegetable gardening, especially for how to grow beets and other root vegetables.
2d. Starting and Planting Beets
You can learn how to grow beets as either a spring or a fall crop. During the high heat of summer, though, when temperatures rise above eighty degrees Fahrenheit and remain up there for weeks on end, the beets can become bitter and woody. Unless you are learning how to grow beets that can be harvested as babies, such as Bull’s Blood, your beets will not be ready to be harvested for at least fifty to sixty days. On the other hand, beets usually will not germinate very successfully if the temperature of the soil is below fifty degrees Fahrenheit.
One way around this problem is to establish raised beds. In addition to double digging your bed, you can add soil to the top of it to create a rounded mound that is about eighteen inches above ground level at its center. Not only will the raised bed have better water drainage and air circulation – both of which are important considerations for how to grow beets – but it will also warm up sooner than below ground soil.
When you are planting beets in a raised bed, you can generally be certain that they will be fine if you plant them about a month before the last frost date. This will be late enough in the spring that the soil in the raised bed has warmed up sufficiently, but also early enough that you will be able to harvest your beets before the hottest days of summer arrive.
2e. Succession Planting
You can learn how to grow beets using succession planting, in which you plant an initial crop followed by a series of bumper crops. This is a great way to extend the length of the garden as well as make sure that you have a steady supply of beets coming out of it. Succession planting for beets works best if you begin in the fall. The cooler weather during the late stage development of the beets ensures that the roots are sweeter, as opposed to growing a succession crop in the late spring, when sudden warmer weather can result in a bad crop.
For how to grow beets through the fall, plant the first batch of beets about eight weeks before the last frost date, and a second crop about three to four weeks after that. You can also extend the life of the beet patch using cold frames. A cold frame is simply a box that is relatively airtight but has either a plastic or glass top to allow light through. By planting a third succession crop of beets six weeks after the first one – usually in about mid October – and then covering it with a cold frame as temperatures begin to drop, as you approach the first frost date, you can be harvesting a final crop as late as Thanksgiving.
Constructing a cold frame for successional beet planting is relatively easy. Because beets are fairly cold tolerant vegetables, the cold frame does not have to be particularly heavy duty to keep soil temperatures high enough for how to grow beets. You can simply build four sides by attaching boards at the corners to form a box. Then, using a staple gun, attach heavy plastic sheeting to the top of the box. It can be especially advisable to build two boxes. The bottom one will not have a plastic “roof” but instead has the top one fit onto it. This allows for more space for the beets to grow upward.
If you are interested in making the building of a cold frame into a more elaborate project, you can construct a heavy duty one using old windows. Build a box that is high enough for the beets to grow in, and angle the top of it so that it slopes downward to the south side of the box. Then, using hinges, attach an old window to the top of the box. This hinged lid will allow you to easily access the vegetables growing in the box, and the use of glass panes will make your cold frame almost like a mini greenhouse.
2f. How to Grow Beets From Seeds or Transplants
While you can certainly learn how to grow beets by beginning them indoors, and later transplanting them as seedlings, I do not particularly recommend it. The amount of care you have to take in order to avoid damaging the taproot is considerable, as well as the very small window you have to work in when transplanting, make starting beets indoors rather impractical. However it does have the advantage of ensuring that those seedlings you do transplant into your garden are all of relatively uniform size, which will therefore prevent plants that sprouted earlier from shading out those that sprout later.
If you do decide to transplant from indoors, start the seeds in soil blocks about two weeks before you would usually plan to sow seeds outdoors. If you choose to learn how to grow beets in this manner, I highly recommend you use biodegradable plant pots. These will break down naturally in the soil, and allow you to transplant the beets without disturbing the tap root too much. Biodegradable plant pots are available at almost any garden center or online.
You should transplant beet seedlings on an overcast day that is not particularly hot. If you transplant them in full sun or on an overly warm day, these factors could add even more stress to a plant that is already stressed from the act of transplanting. Soak the soil until it is evenly moist but not waterlogged, and dig a hole that is slightly deeper and wider than the biodegradable plant pot or soil ball around the tap root. Place the plant in the hole and loosely cover the tap root with soil.
Whether you decide to plant seeds or transplant seedlings, space the planting out to three inches for each beet plant. During the spring planting, plant seeds about a half inch deep and keep the area you have planted them in evenly moist until the beets germinate. If a crust forms on top of the soil, use a hand garden fork to lightly break up the crust no more than an eighth of an inch deep. Because the seeds are actually small dried fruits that will contain the seeds for more than one plant, about a week after the seeds have germinated you will want to go back and thin out the extra plants. Save the thinned out plants – roots and greens – to use as a delicious baby salad green.
3. Caring For And Maintaining Your Beets
 As I said at the beginning of the previous section on planting beets, preparing the garden bed and correctly planting your seeds or transplants are the most critical aspects of how to grow beets. However, this does not mean that you can simply “fire and forget” with your beet crop. It is important that you make sure your beets are getting enough water, that you keep initial weed incursions down, and that you keep an eye out for pests.
3a. Water
Like other root vegetables, beets need to be kept evenly moist without causing them to become waterlogged. That means you will have to monitor the soil to make sure it does not dry out, but avoid flooding your garden bed. I do not recommend using an overhead sprinkler for several reasons. Overhead sprinklers waste water, and they cause the foliage of the plant to get wet. Wet leaves can sometimes promote the spread of disease, but they almost always result in spot burning when drops of water concentrate the sun’s rays onto the leaf. Also, overhead sprinklers, once turned on, can be forgotten: you do not want to come back to your garden only to realize you left the sprinkler on all night, flooding your vegetable beds.
Therefore I recommend watering by hand, using either a hose with a fine mister attachment or simply a watering can. Using a watering can (or, like I do, using several at once) can be a bit tedious, as it requires you to make numerous trips back and forth to the spigot. On the bright side, it’s good exercise, and it allows the gardener to keep track of exactly how much water each garden bed is being given.
3b. Weeds
One of the advantages of learning how to grow beets is finding out that they do not require too much weeding. While seedlings are still being established, it is important to keep weeds out of the garden bed. I recommend simply doing this by hand, and completely pulling out any weeds that may show up, although in my guide on how to grow asparagus I described flame weeding, which is always a good alternative.
Once the beet plants have become established, however, weeds will not be a particularly difficult problem, especially if you space your plants no more than three inches apart. The greens of the beet plants will shade out most if not all competing weeds, thus creating a natural mulch. Still, what few weeds remain in the bed should be pulled by hand to prevent them from gaining any footholds.
3c. Diseases and Pests
Beets seldom have any pest or disease issues that are of concern in a backyard or community sized garden, although in commercial mono-cropping operations that do not adequately rotate their crops, a number of pests and diseases can become problematic. Cleaning up debris at the end of the growing season, rotating crops between beds, keeping any lawns mowed, and keeping weeds and grasses out of the beds should usually be sufficient preventative measures to avoid any problems from arising.
Leaf miners and other beet specific pests can spread from nearby weeds that are in the same botanical family as beets, such as lamb’s quarters. More generalized pests, such as leafhoppers and carrion beetles, can migrate from any tall grasses that may be nearby. As always, I recommend controlling pests in your garden by making it a hospitable place for predatory insects such as praying mantids, green lacewings and lady bugs. Plant flowers such as yarrow, marigolds, and zinnias to attract and retain these natural garden police. You may also consider stocking your garden with them: all of these predators, and more, are available from online distributors.
Diseases can either accumulate in the soil simply by growing a crop in the same location year after year, or can be transmitted by pests. Therefore almost always maintaining your garden using basic preventative measures will prevent any problems. Those few that do remain can be controlled with organic treatments. That said, learning how to grow beets can be one of the easiest things you will do, because they are generally not susceptible to too many disease or pest problems. This is particularly true if you decide to grow them as a late fall, cold season crop. Growing beets in late September and October, especially if done so under a cold frame, will almost guarantee that you will not have problems with pests, diseases, or even weeds, as you will be well out of their comfort zone.
4. Harvesting Beets
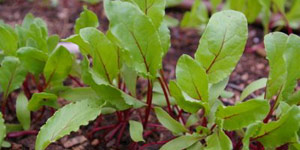
 Beet greens can be harvested as soon as they appear but you should allow them to grow at least a few inches before you pick them. Do not harvest more than a couple of leaves from beets that you intend to grow to produce roots, because doing so will decrease the root yield. Harvest the outside leaves first as they grow big and then the next layer of leaves will continue to gorw. Keep harvesting like that in succession and the plant will continue to produce new leaves for three weeks or longer. As the beet greens are harvested you can store them in a plastic bag in the refrigerator for up to a week until you have collected enough to prepare or preserve.
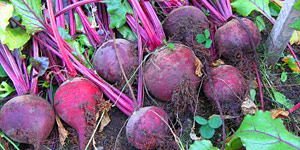
Although it varies somewhat with the variety of the beet plant, generally speaking beets should be harvested when they are no larger than two inches in diameter. If you wait longer than that to harvest, and especially if you wait until the heat of summer has grown intense, the roots tend to get woody and tough. When harvest time comes around, grab the leaf stalks just about the root and pull the beets out of the ground. Cut off the leaf stalks two inches above the root and set aside the leaves for eating. Then hose off all the dirt from the beet root, and let them dry out for a bit.
4a. Seed Saving
Beets are biennials, which means they produce seed in their second year of growth. In the Southern United States, you can mulch the plants with six inches of straw at the end of the growing season and they will produce seed in the second year. In the Northern United States, you will have to cut off the tops, store the roots indoors over the winter, and then replant the roots again the following spring. The roots will produce a flower stalk that can be up to four feet long.
To harvest the seeds, cut the stalk down when most of the seed pods have turned brown and hang it upside down indoors for at least two weeks. Then, use your hands to strip the pods from the stalk into a bag. Break up the pods s o the seeds fall to the bottom of the bag, and discard the larger debris. Then, dry the seeds using a desiccant such as a dried silica gel pack (the kind that often comes in the pockets of new clothes) for a couple of weeks. Store seeds in a labeled envelope in a cool, dark place.
5. Final Word
That was my guide on how to grow beets! I hope you found it informative and enjoyable to read, and I sincerely hope you now feel inspired to get out there are start preparing a bed to grow beets in. In this guide we learned a bit about the history of beet cultivation, what kinds of varieties are available, how to properly prepare a garden bed for growing beets, how to plant and care for your beets, and how you can harvest the beets to be eaten, or grow them for seed. Now you should have all the tools you need for how to grow beets successfully.