Container Gardening
 Container gardening offers a wonderful option for gardeners who are short on space or those who wish to compliment or expand an existing garden.
This guide is intended for anyone who wants to grow even a single plant in a container.
It is filled with container gardening tips and container planting ideas, that you can use for container tomatoes gardening, flower container gardening or even container gardening for vegetables.
This guide is for anyone from urban apartment-dwellers who may not have access to a full garden to suburban and rural gardeners who are interested in expanding their garden without planting full beds.
Whether you are simply growing a small windowsill herb garden, cultivating a few tomato plants on your fire escape, or rounding out your outdoor garden with potted ornamentals, you will find help in this guide on how to succeed.
There are as many kinds of containers as there are approaches to container gardening. Container gardening offers a rewarding practice to the gardener who is willing to tackle its various challenges.
The most significant challenge to the container garden is balancing sufficient watering with proper drainage.
The next major challenge is the limitation placed on nutrient retention in a container.
Thanks to developments that have been made in soilless mixes and container specific soils over the last few decades, these challenges do not have to be particularly daunting.
Furthermore, quite a few ornamental and vegetable cultivars are specifically bred for container gardening, and will thrive under the right care.
In fact, if the container garden is properly established, it can thrive with only a few hours of maintenance a week.
Self-watering containers, mulches, and plant food, if used in the right combination, can provide all of the water and nutrients your plants need, with minimal involvement once you have set up your containers.
In this guide, I begin by discussing the different kinds of containers available. I will go through what kinds are best for your project, as well as how to decide how many you need. I will talk about purchasing or making your own containers and how to take care of them. Then I will cover the different kinds of soilless potting mixes that are commercially available, as well as organic mulches and compost. After that, I will discuss the kinds of plants that do well in containers, and includes sections on ornamentals, vegetables, and herbs, respectively. Then I will explain what is needed to plant and care for container plants, and various strategies for watering, fertilizing, and weed and pest control.
Correctly setting up the garden is, as always, key to its success.
If you follow this guide, your container garden should thrive, providing you with delicious vegetables or beautiful flowers all season long.
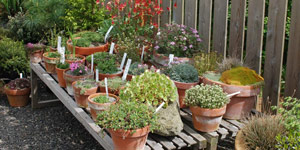
1. Containers
1a. Kinds Of Containers
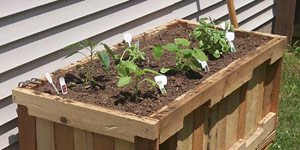 There are many different containers that can be used for this garden. Garden centers sell pots and other containers for different kinds of plants. They can be plastic, concrete, or terracotta. You don’t have to buy new ones, though. You can often find good pots at garage sales or thrift stores. These will save you a lot of money. Also, you do not have to use pots. You can use plastic buckets and baskets as planters. You can also build planters from different materials. Large planters can be built by stacking bricks or concrete blocks to make four walls. Then, fill in the space between them with soil. Or, for smaller vegetables and herbs, fill the empty spaces in concrete blocks with soil. These can be stacked to make pretty living walls. You can recycle all sorts of containers to make planters.
Containers must be well drained for plants to be healthy. Make sure there are holes in the bottom of the container. Then place a few small rocks in the bottom. The rocks will help keep water from collecting in the bottom. Fill the container with a good mix of well-drained soil. The soil should not be too sandy or have too much clay. When you water the container, some water should flow out of the bottom. If it doesn’t, or if the water puddles on the top, the soil may be too dense.
It is very important to think about the amount of space each plant’s roots will need when choosing containers. Some vegetables have been bred to do well in small containers. Others need lots of room. Without enough room, the plant will get root bound. This means the roots will be cramped in the pot. If the plant is root bound, the parts that grow above ground will not do well. The plant will become stunted and may not produce any vegetables at all.
Once you have decided what you are going to plant, you need to find out what size containers you need. Make a list of the vegetables you will grow. Then make a list of containers. Your list should say whether the containers you need are small, medium, or large. Once you know how many of each kind you need, start looking!
Very small plants do not need much room to grow and thrive. For these plants, like lettuce, radishes or carrots, small containers will do. You can use coffee cans with holes punched in the bottom. Or you can cut the tops off of milk jugs. See article four for more ideas about what you can use to make containers.
1b. Buying Containers or Making your Own
Anything can be a container if it is sturdy, holds water, and can be drained. What that means is that the walls should be strong enough to hold a lot of wet soil, which is heavy. It should also not leak through the sides. And it can be drained if you can make holes in the bottom of it. That means that glass or solid concrete containers do not work well. If the container does not drain, the plant will not grow properly.
If you are using containers with porous material, they might need to be lined. “Porous” materials have tiny holes in them and can absorb water. Wood is an example of a porous material. If wood is soaked in water, it will absorb it. This will make the wood become soft and rotten over time, which will ruin your container. You can find out if a material is porous by pouring water on it. If you can wipe all of the water off with a cloth, it is not porous. If you wipe it off and the material stays wet, it is probably porous.
Some materials, like terra cotta, are porous, but are not damaged by becoming wet. Still, they can have leftover minerals or even plant diseases in them. If you buy used terra cotta pots, be sure to clean them before you use them. You can kill any diseases in them by baking them at 225 F for an hour.
You can line wooden containers with plastic sheets or garbage bags. Poke holes in the bottom of the plastic so that water can drain. Terra cotta pots do not have to be lined. If you choose to do so, you can use plastic pot liners that are made just for this purpose.
As mentioned earlier, you can also buy upside-down containers for growing vegetables like tomatoes or peppers. These are fun to grow in. They are also easier. Upside-down tomatoes do not need stakes or cages to hold them up. Pests have a hard time finding upside-down planters. You can buy upside down planters that come with everything you need at the garden store. Or you can make your own out of milk jugs.
Cut the bottom off a milk jug. Turn the jug upside down. Then, thread a seedling that is at least four or five inches tall through the top of the jug. Be sure to keep the seedling in its root ball when you do this. Fill the rest of the jug at least halfway with soil. Punch holes in the sides of the jug at least four inches from the bottom. You can reinforce the holes with grommets. Make at least three holes so the jug is balanced. Then, attach ropes or twine to the holes and hang the jug. Water normally. You can also make larger upside-down pots from buckets. As always, be creative.
Self-watering containers are a great way to water your plants. These containers let you do less work, and also make sure your plants always have enough water. They are also great for water conservation.
These work in the following manner. The reservoir connects to pipes that are under the soil. Or the reservoir may directly connect to the soil. As the soil dries out, water moves into it from the reservoir. With these containers, you only ever have to fill the reservoir. This has more than one benefit. It means less work for you, because you only have to fill the reservoir once or twice a week. It also means that much less water is wasted. You will not lose water by splashing it on the soil. You also will not lose water as it drains from the bottom of the pot.
You also do not have to worry about over-watering or under-watering. The water will flow into the soil when it needs more. This will keep it just right for your plants. All you have to do is make sure you keep the water level full in the reservoir.
You can buy self-watering containers at garden stores. When you are choosing one, consider what you will be planting in it. You need it to be the right size for the vegetable you will be growing in it. Some of these containers are designed for one kind of vegetable or another.
2. Soil Mixes
 In this section we will discuss how to choose the right soil for your plants. A good mix of soil will help your plants to be healthy and grow well. It is very important to use a good mix when you are growing vegetables in containers. A well prepared bed of soil is fine for growing plants in the garden. But when growing plants in pots, this kind of soil is not the best. As we have learned, you need a soil mix that has good drainage. But you also need a soil mix that will hold on to moisture when it is watered. The kind of soil in your garden is probably too dense to work well in pots. If you want to use soil taken from your garden, you will need to mix it with other materials. This will make sure it is loose enough that it will drain well. It will also make sure that there is enough aeration. Aeration means that air can move through the soil to get to the plants’ roots. If air cannot get to the roots, or if the soil does not drain well, your plants will grow poorly or even die.
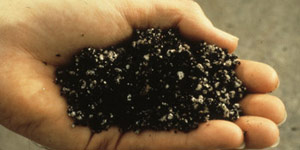
There are different ways you can add to the soil to make it better for use in containers. A very simple mix adds peat moss and coarse builders’ sand. Peat moss is also called sphagnum. You can buy dried, broken down peat moss at garden centers. Coarse builders’ sand is better than beach sand or sandbox sand. It has larger particles than the other two kinds. Mix equal parts of garden soil, peat moss, and coarse builders’ sand.
If you have access to compost, this can be a very good addition to your potting soil. Compost is a process where organic matter is broken down to make soil. Organic compost will be a mix of kitchen scraps and garden waste. A combination of equal parts sandy soil, mulch, and finished compost will make a great potting mix.
You may also choose to buy potting soil from a garden center. This is a good way to make sure that you are getting quality soil for your pots. The soil will often already have peat moss or other organic matter mixed into it. There will be different kinds of potting soil mixes that are intended for different kinds of plants. You can also ask for advice at the garden center about which kind you should buy.
2a. Potting Mixes
You will need to pick out a potting medium that meets a few of the plants’ needs. The mixture should be firm enough to support the plants as they grow. It will also need to be dense enough for the roots to be held snugly. It has to be heavy enough to prevent containers from tipping over. This is especially important if you live in a windy area. If you are worried that your mix is not heavy enough to keep the pot from tipping over, there is a simple fix to that problem.
You can always place a heavy rock in the bottom of your pot before you fill it with soil. The rock will not get in the way of the roots’ growth, and it should prevent the pot from blowing or tipping over. It will also fill up some of the space in the pot. This means you will not need to use as much potting mix to fill the pot. It is even better to use a few smaller rocks in your pot. This will provide the weight you need to keep it from blowing over. But it will also break up the soil at the bottom of the pot. This will help make sure the pot has good drainage.
The potting mix has to be able to retain moisture. You do not want it to be so loose that water runs right out of the pot. But it also has to be loose enough that roots can grow through it. It also has to be loose enough to allow air to reach the roots. A good mix will have just enough density to hold some moisture but not so much that it keeps the plant from being healthy.
If you have a good mix, water will move through it quickly and drain freely through the bottom of the pot. When the extra water has drained out, air will move into the large spaces. But enough water will be left behind in the small spaces. This will provide plenty of moisture for your plants. In a bad mix, the water will move slowly through it. The mix will become heavy and waterlogged. You can even have a crust of algae or salts form on the surface. If this happens, the roots will not get enough air. The plant’s growth will slow down and even stop. Foliage will become yellow. In the worst cases, the plant will suffer from root rot and die.
2b. Organic Mulches
In order to provide nutrients to the plants in a slow-release fashion, as well as to keep weeds from becoming established in them, I recommend mulching. Mulches also retain moisture in the soil by preventing evaporation at the surface. In a container, this is of paramount importance.
Organic mulches can be purchased at gardening centers, or you can make your own. An organic mulch can be any mix of dead and decaying plant matter – called detritus – that you retrieve from your garden. Leaves, bark, grass clippings, plant stems: all of these make excellent mulches. Alternately, you can purchase mulch made of different kinds of tree bark, straw, or peat moss.
It is best to apply mulch after spring temperatures have risen, but before the soil has begun to lose its moisture quickly. You will have to gauge the best time for your area. In containers, potting mixes tend to lose their moisture quickly, so it is good to apply mulch almost as soon as you move your containers outdoors.
2c. Compost For Container Gardening
Compost is of great benefit to any garden, and container gardens are no exception. If you do not have a compost pile, and only have a few containers, try to locate a community garden with a compost pile. Alternately, you can compost your kitchen scraps and lawn clippings in a small compost bin in your garden. For a small container garden, it is not necessary to have a large compost pile, and much of it will wind up not being used. Because of this I will not extensively cover how to set up a bin, although you can find this information in either the organic gardening guide or the vegetable gardening guide. However I will mention that adding a bit of compost to each of your potting mixes will go a long way to ensuring you grow healthy, robust plants.
3. Plants for Container Gardening
 It’s important to consider which pants you will grow in your garden before you head off to your local gardening center to stock up. Ornamentals need to be suited to your climate, the growing season, and the site where you will place the containers. Most importantly they should be suited to your particular taste. Vegetables should be of a variety that is cultivated specifically for containers. These are “dwarf” or “patio” varieties. But they should also be vegetables that you like to eat. Here we will examine various considerations for choosing plants.
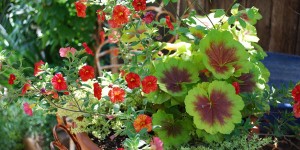
3a. Ornamentals
Check the plant information before you buy. If the tag doesn’t tell you the plant’s approximate size when it is mature, ask the dealer at the center. Choose plants whose bulk of foliage at maturity will be no more than twice the volume of the container. If a plant is 2 feet tall and 1 foot wide at maturity, it will have a bulk of 2 cubic feet. One cubic foot will fill a 7-gallon container. So a container of 5 to 7 gallons should work for this plant. This formula works for single plants or for combining multiple plants in a container.
In containers you can generalize that ornamentals will take one of three forms at maturity: trailing, mounding, or erect. In large containers you can combine rings of trailing and mounding plant forms around one or more erect plants in the center. You can use a single tall leafy plant in the center. Or you can group three or four slender flowering plants.
Generally it is better to combine either warm colors or pastels in a given container, but not both. If you mix palettes, try to combine some silver or gray leaves to reduce the contrast. Plants with blue or white flowers also tend to smooth visual clashes between strongly contrasted colors. You may wish to avoid clashes between textures as well, but this is a matter of personal taste. A large enough container can accommodate a variety of foliage textures and flower sizes and shapes.
Whether you choose to grow annuals or perennials should generally be determined by your USDA hardiness zone. You may grow perennials in zones 5 and north, but you will likely have to take your plants indoors to overwinter them. In zones 6 and south you can plant most perennials in pots that stay outdoors all year long. However north of zone 7 it is wise to err on the side of hardy, frost-tolerant perennials in the event of an unpredictable winter.
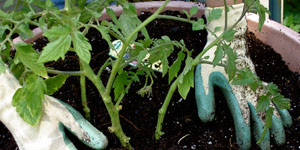
3b. Vegetables
Quite a few varietals of different vegetables have been developed that are specifically bred to be grown in pots. These are alternately referred to as patio or dwarf varieties. They will have a smaller mature foliage bulk than other varieties. Sometimes, but not always, they will produce smaller fruits or vegetables. Some varietals, such as habaneros or cherry tomatoes, were instead bred specifically to produce smaller fruits, but have the added benefit that they are naturally rather small plants. These vegetables have smaller root diameters than other varieties as well. Often, patio varieties are somewhat hardier and therefore can tolerate mild drought conditions, which is to say you do not have to water them quite as much as other varietals.
Most greens and many cold season root vegetables can do quite well in pots. These do not tend to grow very large under any conditions, and so will thrive in a medium-sized pot. Because of watering and nutrient conditions in a container, you must be careful not to pack them too densely in one container. If you decide to do so, be sure you are providing enough water and plant food for them to do well.
With all vegetables in pots, proper watering is a major concern. I will cover watering container gardens in a later section. The advice is particularly applicable to vegetables. Vegetables that are allowed to wilt too many times will eventually wither and either not produce as much yield as you would otherwise see, or die altogether. Be sure you are checking up on your vegetables regularly no matter how you choose to grow them; this is especially true if you grow them in containers.
3c. Herbs
Herbs are by and large perfect for growing in containers. Most herbs will adapt well to the space they are given, and while they also need proper water and nutrient applications, they can generally thrive in most growing conditions. The benefit of growing herbs in pots is that you can start them very small, and begin harvesting them soon after. Because we typically eat the foliage of herbs, we are constantly cutting them back. This is true only if you eat the herbs you grow, of course.
Certain herbs, like rosemary, will do well if continually cut back in a small or medium pot. But this herb will also thrive and grow into a large, robust bush if allowed to do so in a large pot. Rosemary can also overwinter in many USDA zones 7 and higher. Many cultivars of the mint family thrive in containers as well, and can easily adapt to a wide range of sizes.
I have several small herbs growing in my kitchen year round. They require a grow lamp in the darker months of winter, but do quite well nonetheless. During the summer I move the containers to my backyard, and they grow as large as I let them in the hot months. In this way I have fresh herbs for my kitchen every day of the year!
4. Planting and Care
4a. Preparing the Container
 There are a few steps you should follow to prepare your container for planting. These are not completely necessary every time you plant, but they are a fairly good method to stick to, whether you are germinating seeds in the ground or transplanting seedlings from a garden center.
Place a few rocks at the bottom of the container. They will serve to keep the potting mix from compacting too much at the base of the container, allowing drainage occur unimpeded. Then, prepare the mix. The ratio of each is up to you and depends to some degree on what you are planting. You may choose to simply fill the pot with a soilless mix that comes with fertilizer already in it. Or you may choose to prepare your own mix. What you choose to do depends on your level of experience, the amount of work you wish to apply, and the available budget.
Prepare the soil in your container by mixing together your chosen ratio of potting mix, plant food, fertilizer, and mulch, depending on what you have decided to use. Then thoroughly soak the soil, mixing it with a trowel or gardening fork while you do so. Make sure the soil mix is completely saturated. Let the container drain until no more water is pooling under it. You may want to let it sit for twenty minutes or so.
4b. Planting
You can plant in your containers one of two ways. You can buy seedlings from a catalog or nursery. Alternately you can plant seeds directly in the soil. There is no hard and fast rule for which plants should be started from seed and which should be planted as seeds in the soil. There are benefits and drawbacks to each method. I like to start most of my plants indoors for a few reasons.
Since you will be container gardening, you also have a third option. Depending on the size of your containers, you can start them indoors, and when the weather is warm, you can move them outside. This can be hard to do if you are using very large containers. But if you are using medium-sized pots, you can get the benefit of starting your plants indoors. This protects them from the weather and lets you start them earlier. It also keeps the plants safe from any stress they might suffer. The act of transplanting plants can cause them a lot of stress. So making sure you do not have to transplant can benefit them in the long run.
Planting from seedlings is a way to ensure that your container garden will be successful. Buying seedlings can be much more expensive than buying seeds. Each seedling will cost at least a few dollars. Meanwhile you can buy a packet of dozens of seeds for a dollar or two. Buying starts also usually limits the available variety. Not as many different kinds of plants will be available. Garden centers often just have the most popular vegetables for sale as seedlings. But buying seedlings allows you to start later in the season.
Transplanting a seedling is a process that causes stress to the plant. It is important to transplant the seedling very carefully. Be sure to follow these steps when you are planting your new seedlings. This will make sure they are not too stressed out. If they are kept happy and cared for from start to finish, they will grow well.
If you plant seeds, follow the instructions on the seed packet after you have prepared the container as described above. If you plant a seedling, dig a hole that is a bit bigger than the plant’s root ball. Transfer the seedling to the hole and fill in around it with more potting mix. Water close to the plant, and mulch around it to stave off any weed growth.
4c. Watering
Watering is especially important in container gardens; containers are not very deep, and they tend to dry out quickly. If you do not water for even a few days, your plants could suffer. So you will want to water your plants at least every other day. If they are in full sun, they will dry out more quickly. If it is very hot out, they will also dry out more quickly.
You can also check the soil to see if you are watering enough. There are two ways to check the soil. You should do them both. Check the surface of the soil. The soil should be slightly moist to the touch. If it is not, you need to water it. To see how deep you are watering, push a metal rod or wood dowel into the soil. Dry soil will be harder to push through than wet soil.
It is important to make sure you are watering deeply. If you are only watering the top layer of the soil, you are not watering enough. Depending on the plant, the root system can grow down to as much as eighteen inches. Watering deeply promotes this growth and makes the plant healthier. When it is very hot and dry out, water your container until you see water seep out of the holes in the bottom. This way you can be sure that you are soaking the soil deeply. Do not do this more than once a day, however.
The best time to water your plants is in the morning. This will make sure they have what they need to grow during the sunny, hot day. Watering in the afternoon runs the risk of having drops of water sit on the leaves. The drops of water will magnify the sunlight, and this can burn the leaves! To avoid this, if you cannot water in the morning, you should water in the late afternoon.
There are a few different ways you can water your container garden. You can do it by hand, with a watering can. Or you can consider using a sprinkler, a watering can, using a hose, or using watering crystals.
The best kind of can has a long spout. A can with a long spout is good because you can reach under plants when you water them. Remember, it is important to water at the base of the plant. This way you do not get water on the leaves, and you are sure to get water to the roots. It is also better if the spout is attached to the base of the watering can. This will make it easier to pour without spilling. The best kind of spout has a piece at the end called a “rose.” The rose is a piece at the end of the spout with small holes in it. This is to break up the stream of water into smaller streams. In this way you can water your plants without putting too much pressure on the soil.
You can also use a hose to water your plants. You can either do this by hand or with a sprinkler. Sprinklers are best for large gardens that need a lot of water, but they can be used for small container gardens as well. If you use a sprinkler, be sure to use it only in the early morning or late evening. Also remember to turn it off after your plants are watered. If you leave it on too long, you will over-water your plants. You will also waste a lot of water!
Using a hose to water by hand can be an easy way to get the job done. With a hose you will not have to make several trips back and forth to the spigot. If you use your hose to water by hand, it is helpful to use a special nozzle. Many different kinds of nozzles are available at garden stores. They are designed for different purposes. Some are on long wands for reaching hanging plants. These can also be useful for reaching under the leaves of large plants like squash or cucumbers. Others are designed to provide different sprays and can produce a strong, concentrated spray or a soft, fine mist.
You might also consider watering your container garden is with watering crystals. These are made of special materials that hold onto large amounts of water. You can just put them in your containers, and they will slowly release water when the soil is dry. This is a good way to keep your plants watered if you cannot garden for several days. For example, if you go on vacation and will not be able to water your plants, you can put watering crystals in the containers.
4d. Fertilizer
Fertilizer is a very important part of container gardening. This is because all of the nutrients your plants will get come from the soil in the pot. If the soil is not rich in nutrients, the plants will not do well. But you have to be careful what you choose. If you are growing vegetables, the nutrients they get from the soil will be what you consume. Because of this you should avoid chemical fertilizers. It is also important to avoid chemical weed-killers when you are growing vegetables. As with fertilizer, when you eat the plants, the chemicals will end up in your body. Beside this, chemical weed-killers are bad for the environment. When you water your plants, some of the chemicals will run out of the bottom of the pot with extra water. In this way they can seep into the ground. From there they can enter waterways and the water table. There are organic options that you can use to solve both of these problems. These options are better for the environment, your plants, and your own health.
You can also use compost as a fertilizer. As we discussed in an earlier chapter, compost is decayed organic matter. You can usually find a compost bin at local community gardens. Ask the gardeners there if you can use some of their compost. Or, you can make your own. Combine your yard waste with your kitchen waste. You will need to use equal parts of each. Mix them together in a garbage bin that you keep in the yard. Using a pitchfork or spade, turn the compost mix regularly. By the end of the season, the compost mix will have broken down into nutrient-rich potting soil. You can use this the next year.
When you are growing plants in containers, you should not need to use a weed spray. Instead, you can control weeds with a couple of easy steps. First of all, just be sure to pull any weeds as soon as you see them.
The second thing you can do is mulch your pots. Mulch is a mix of dead leaves, hay, bark, or other plant material. Once your seedlings have become established, spread mulch around them. The mulch prevents sunlight from reaching any weeds that are trying to grow beneath the soil. You can also mulch with store-bought materials. These include black plastic or landscape fabric. They all work the same way. Spread them out around the plants you want to grow. They will block the sunlight from reaching the plants you do not want to grow.
4e. Pests
Pests can be a problem in your garden. If pests get a foothold, they can destroy your plants. There are many different kinds of garden pests. It is important to understand them. This way you can recognize them and act quickly to get rid of them.
Pests are often insects, but they can also be birds and small mammals. Insects will attack the entire plant, eating the vegetables, leaves, and sometimes even the stems. Birds and small mammals, on the other hand, mainly target the vegetables and leaves only. Different animals will be attracted to different parts of the plant.
Many small mammals can be foiled simply by keeping your containers out of their reach. Most containers are tall enough that rabbits will not be able to get to your veggies. You can keep birds away with a simple trick. Attach shiny, metallic ribbon to the end of wooden stakes. The stakes should be at least twelve inches long. Push a few stakes with ribbons on them into each pot. The ribbons will blow in the breeze. The shiny, moving objects will scare away birds.
If you do find that one or more of your plants is infested with pests, it is important to act quickly. You may decide to use chemical bug-killers, but I do not recommend it. Just like with weed-killers, the chemicals will be absorbed by the vegetables. That means you will be ingesting them when you eat the vegetables. And just like with fertilizer and weed-killers, there are organic options.
The simplest method is to wash the pests off with soapy water. This is a good solution for bugs like aphids. These bugs infest and eat the leaves on your plants. Using a cloth and soapy water, gently wash all of the aphids off the leaves. The water should drown the insects and clean off the leaves. Organic insect sprays are also available at garden centers.
5. Final Word
I consider growing a mix of ornamentals, herbs, and vegetables indoors and out to be a wonderfully rewarding exercise. While putting together the various parts of highly unique container assemblies, you will have to bring together a number of different talents. It requires an appreciation of aesthetics: color, texture, and form. It requires an appreciation of the function of plants, and what each requires to thrive in concert with others. As you move on to larger and more complicated plantings, you will combine new, rare, or strange cultivars.
I hope the information provided in this guide has proved useful, and that it has been an enjoyable read. Best of luck in your container gardening endeavors!